Set up the app's menus and home dashboard
Build the app's bottom bar and side drawer menus, with icons, links, badges and targeting, and its home dashboard, from widgets or a custom screen. Then publish the dashboard.
- Applies to
- Core Mobile 2.0 and later
- Who can do this
- Platform owner
- Permission
feature.cm. nav.edit - Where
- Core Mobile › Navigation or App Dashboards (Platform Administration)
On this page
Before you start
- For menus, you need Create Navigation and Edit Navigation (
feature.,cm. nav. create feature.).cm. nav.edit - For dashboards, you need Create Mobile App Dashboard and Edit Mobile App Dashboard (
feature.,cm. mobile_dashboard. create feature.).cm. mobile_ dashboard.edit - Ask whoever builds the app for the routes, deep links, icon names and widget components it understands. A name the app doesn't know shows its fallback, or nothing.
Build a menu
1. Create the menu
-
In the Platform Administration sidebar, select Core Mobile › Navigation.
-
Select Create.
-
In Menu, choose where the app shows it: Bottom bar, Drawer or Custom.
-
Enter a Name for your team.
-
Choose a Platform, or leave it empty for all platforms. A menu for one platform replaces the all-platforms menu of the same kind on that platform.
-
Leave Active on.

-
Select Save.
2. Add the items
- On the menu's row, select Manage items. The Items screen for the menu opens.
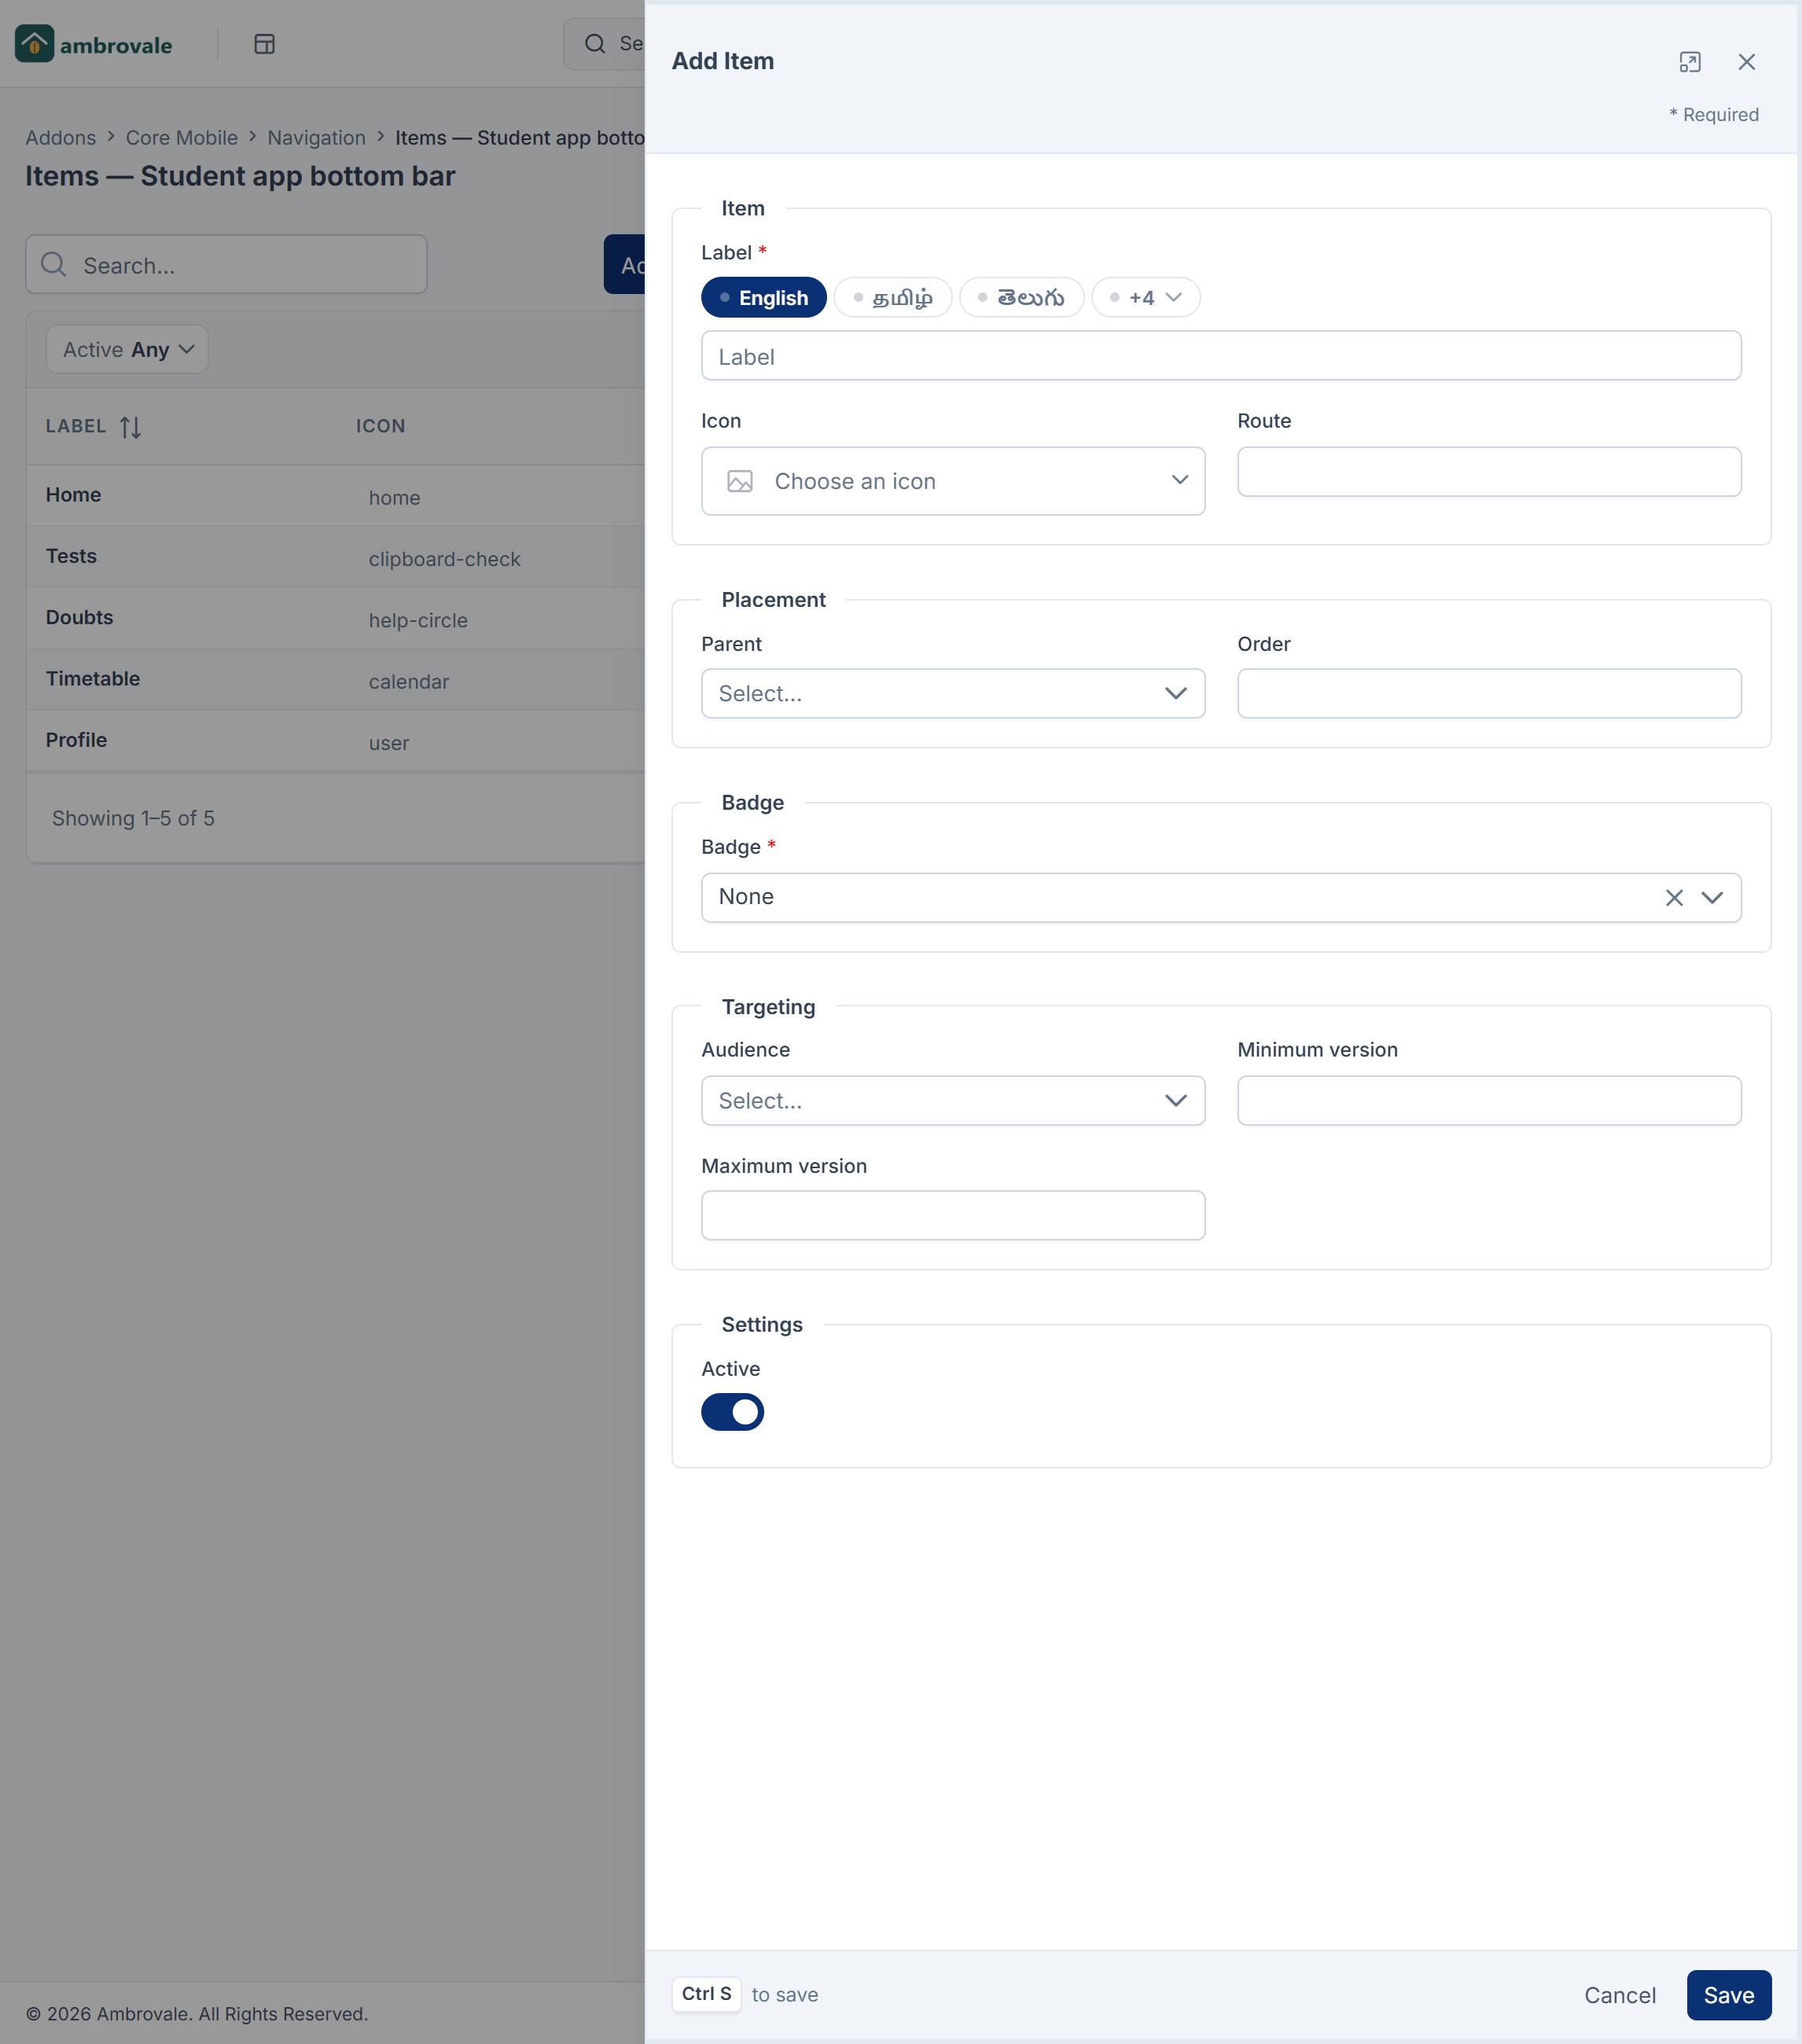
- Select Add Item.
- Under Item, enter the Label (you can enter it in each language), choose an Icon, and enter the Route: the app screen or deep link the item opens.
- Under Placement, choose a Parent to put the item inside another one, or leave Top level (no parent). Set its Order.
- Optional: under Badge, choose Count or Dot, and a Badge key that tells the app which number to show.
- Optional: under Targeting, choose an Audience, a Minimum version or a Maximum version.
- Under Settings, leave Active on.
- Select Save.
Each app gets only the items it matches. Hiding a parent hides everything inside it. The bottom bar ignores parents and shows its items in one row, so use parents in the drawer only.
Build the home dashboard
A dashboard is the app's home screen. You can have several: each app gets the matching published one with the highest Priority.
1. Create the dashboard
-
Select Core Mobile › App Dashboards.
-
Select Create.
-
Enter a Name.
-
In Custom component, leave None — compose widgets to build the screen from widgets. Or enter the name of a whole screen built into the app: the app then shows that screen, and ignores any widgets, their targeting and translations.
-
Choose who gets it: Platform, Minimum version, Maximum version and Audience, as for onboarding. A dashboard with a version limit is skipped for an app that doesn't send its version.
-
Set Status to Draft for now, and set Priority: higher wins when more than one dashboard matches.
-
Choose Personalisation: Allowed lets each person reorder and hide widgets on their own phone. Locked ignores their saved layouts, without deleting them.

-
Leave Active on and select Save.
2. Add the widgets
-
On the dashboard's row, select Manage widgets.
-
Select Add Widget.

-
Under Content, enter the Title and optionally a Subtitle, in each language if you need to. The Widget key is made from the title and never changes, so people's saved layouts keep working.
-
Under Behaviour, choose the Type:
- Stat card: a single figure.
- Chart: also choose a Chart shape: Line, Bar, Pie, Donut or Area.
- Custom: also enter the Custom component built into the app that draws it.
Then enter the Data source key that supplies its figures.
-
Under Appearance, enter an Icon name from the app's own icon set, choose a Colour (Primary, Secondary, Success, Warning, Error, Info or Neutral), and set Columns and Rows from 1 to 4.
-
Under Settings, turn on Pinned if people mustn't hide this widget, and leave Active on.
-
Select Save.
Drag the widgets to put them in order.
Careful: Core Mobile 2.1.0 sends each widget's description but no figures: nothing supplies the Data source values yet, so the app shows each widget's empty state.
If the dashboard uses a custom component, the Widgets screen warns that these widgets never appear in the app.
3. Publish the dashboard
-
Edit the dashboard and set Status to Published. To start it later, set a future Publish at rather than choosing Scheduled. In Core Mobile 2.1.0, a dashboard set to Scheduled is never sent.

-
Optional: set Expire at.
-
Select Save.
Core Mobile comes with a published example dashboard, Laramin Home. Archive it, or give yours a higher Priority.
What happens next
The app gets the new menu or dashboard the next time it asks. If it doesn't, see The app doesn't show your changes.
Thanks. That helps us decide what to write next.
Thanks for telling us what was missing.
You already answered for this article today. Thanks.
We got a lot of answers from your network just now. Try again in a few minutes.
We couldn't send that. Check your connection and try again.
Links in this article
Printed from help.laramin.in. The online article may have changed since.