Create a role and assign permissions
Create a new role, then choose what it can see and do, resource by resource, and review every change before you save.
- Applies to
- Roles & Permissions 1.3 and later
- Who can do this
- Platform owner, Administrator
- Permission
feature.rbac. role. create - Where
- Roles and Permissions › Roles (Platform Administration)
On this page
Before you start
- You need Create Role (
feature.) to create the role and Edit Role (rbac. role. create feature.) to choose its permissions, both held globally. Out of the box, only super admins have them.rbac. role.edit - Check the existing roles first. If one is close, you can copy its permissions into the new role.
- You can only grant permissions you hold globally yourself. Super admins can grant any.
Create the role
-
In the menu, open Roles and Permissions › Roles.
-
Select New Roles.
-
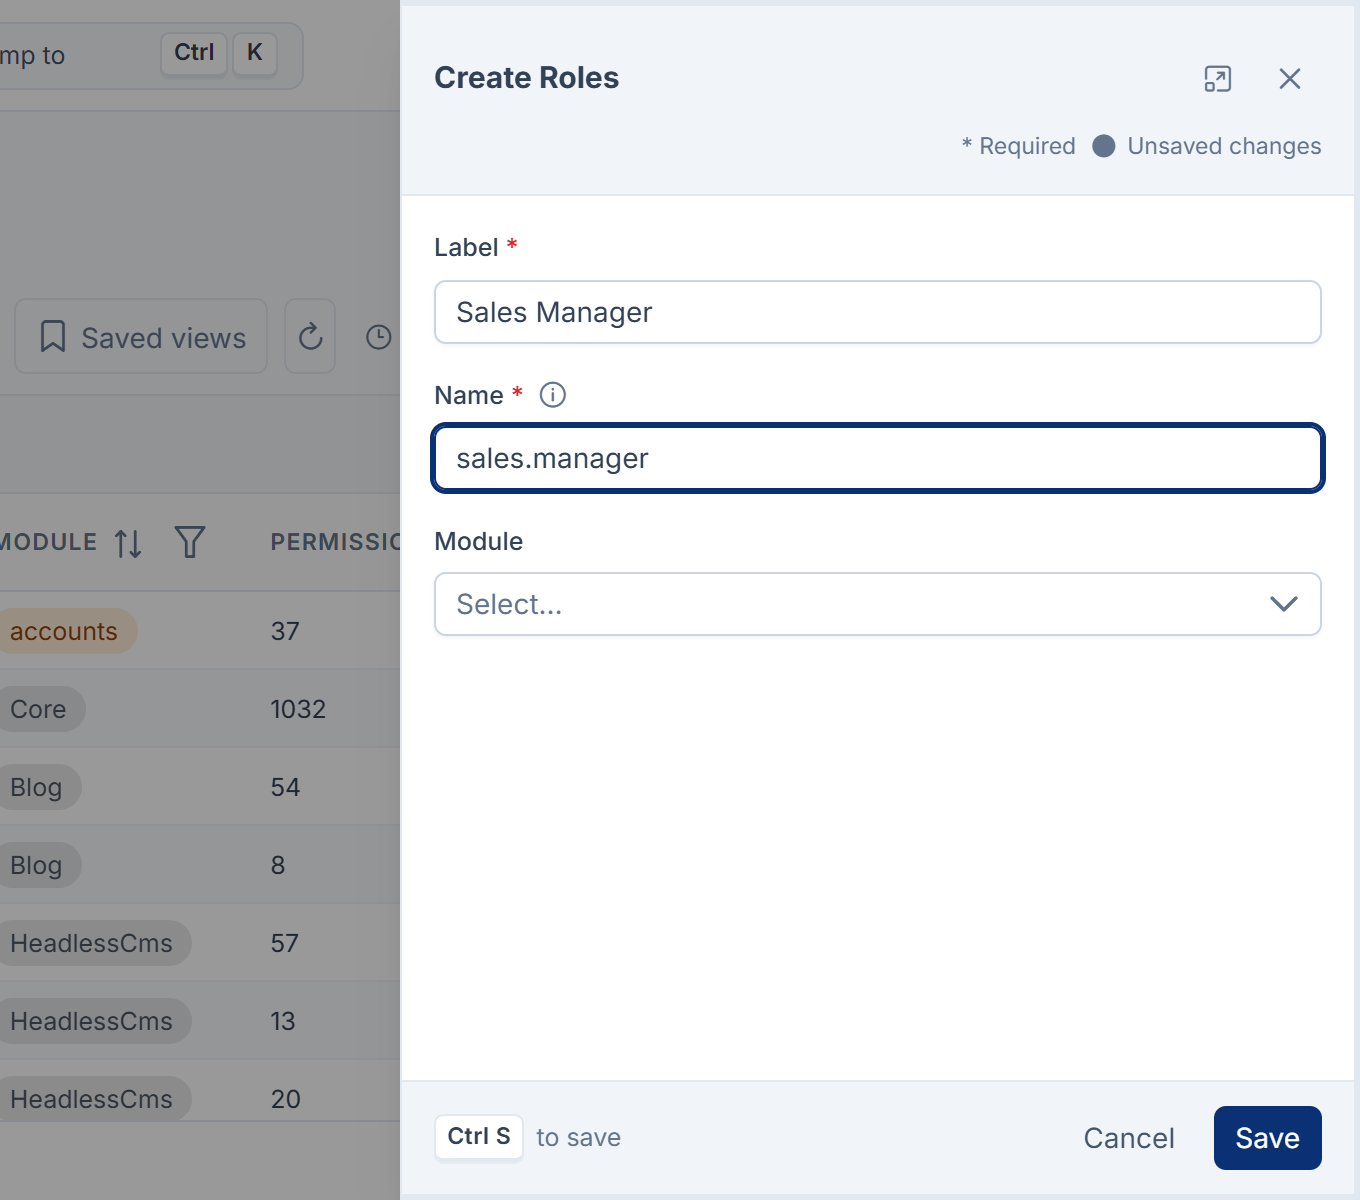
Enter a Label. This is the name people see everywhere, for example "Sales Manager".
-
Enter a Name. This is the role's system name, used by Laramin's code, for example
sales.manager. It must be unique. After you save, only a super admin can change it.You can't use the names that belong to Core:
super.admin,administrator,adminanddev.admin. -
If you're a super admin, you can also choose the Module the role belongs to. This only labels the role in the list.
-
Select Save.
The role now appears in the list with 0 under Permissions. A new role can do nothing until you give it permissions.
Choose its permissions
-
On the role's row, select Manage permissions.
-
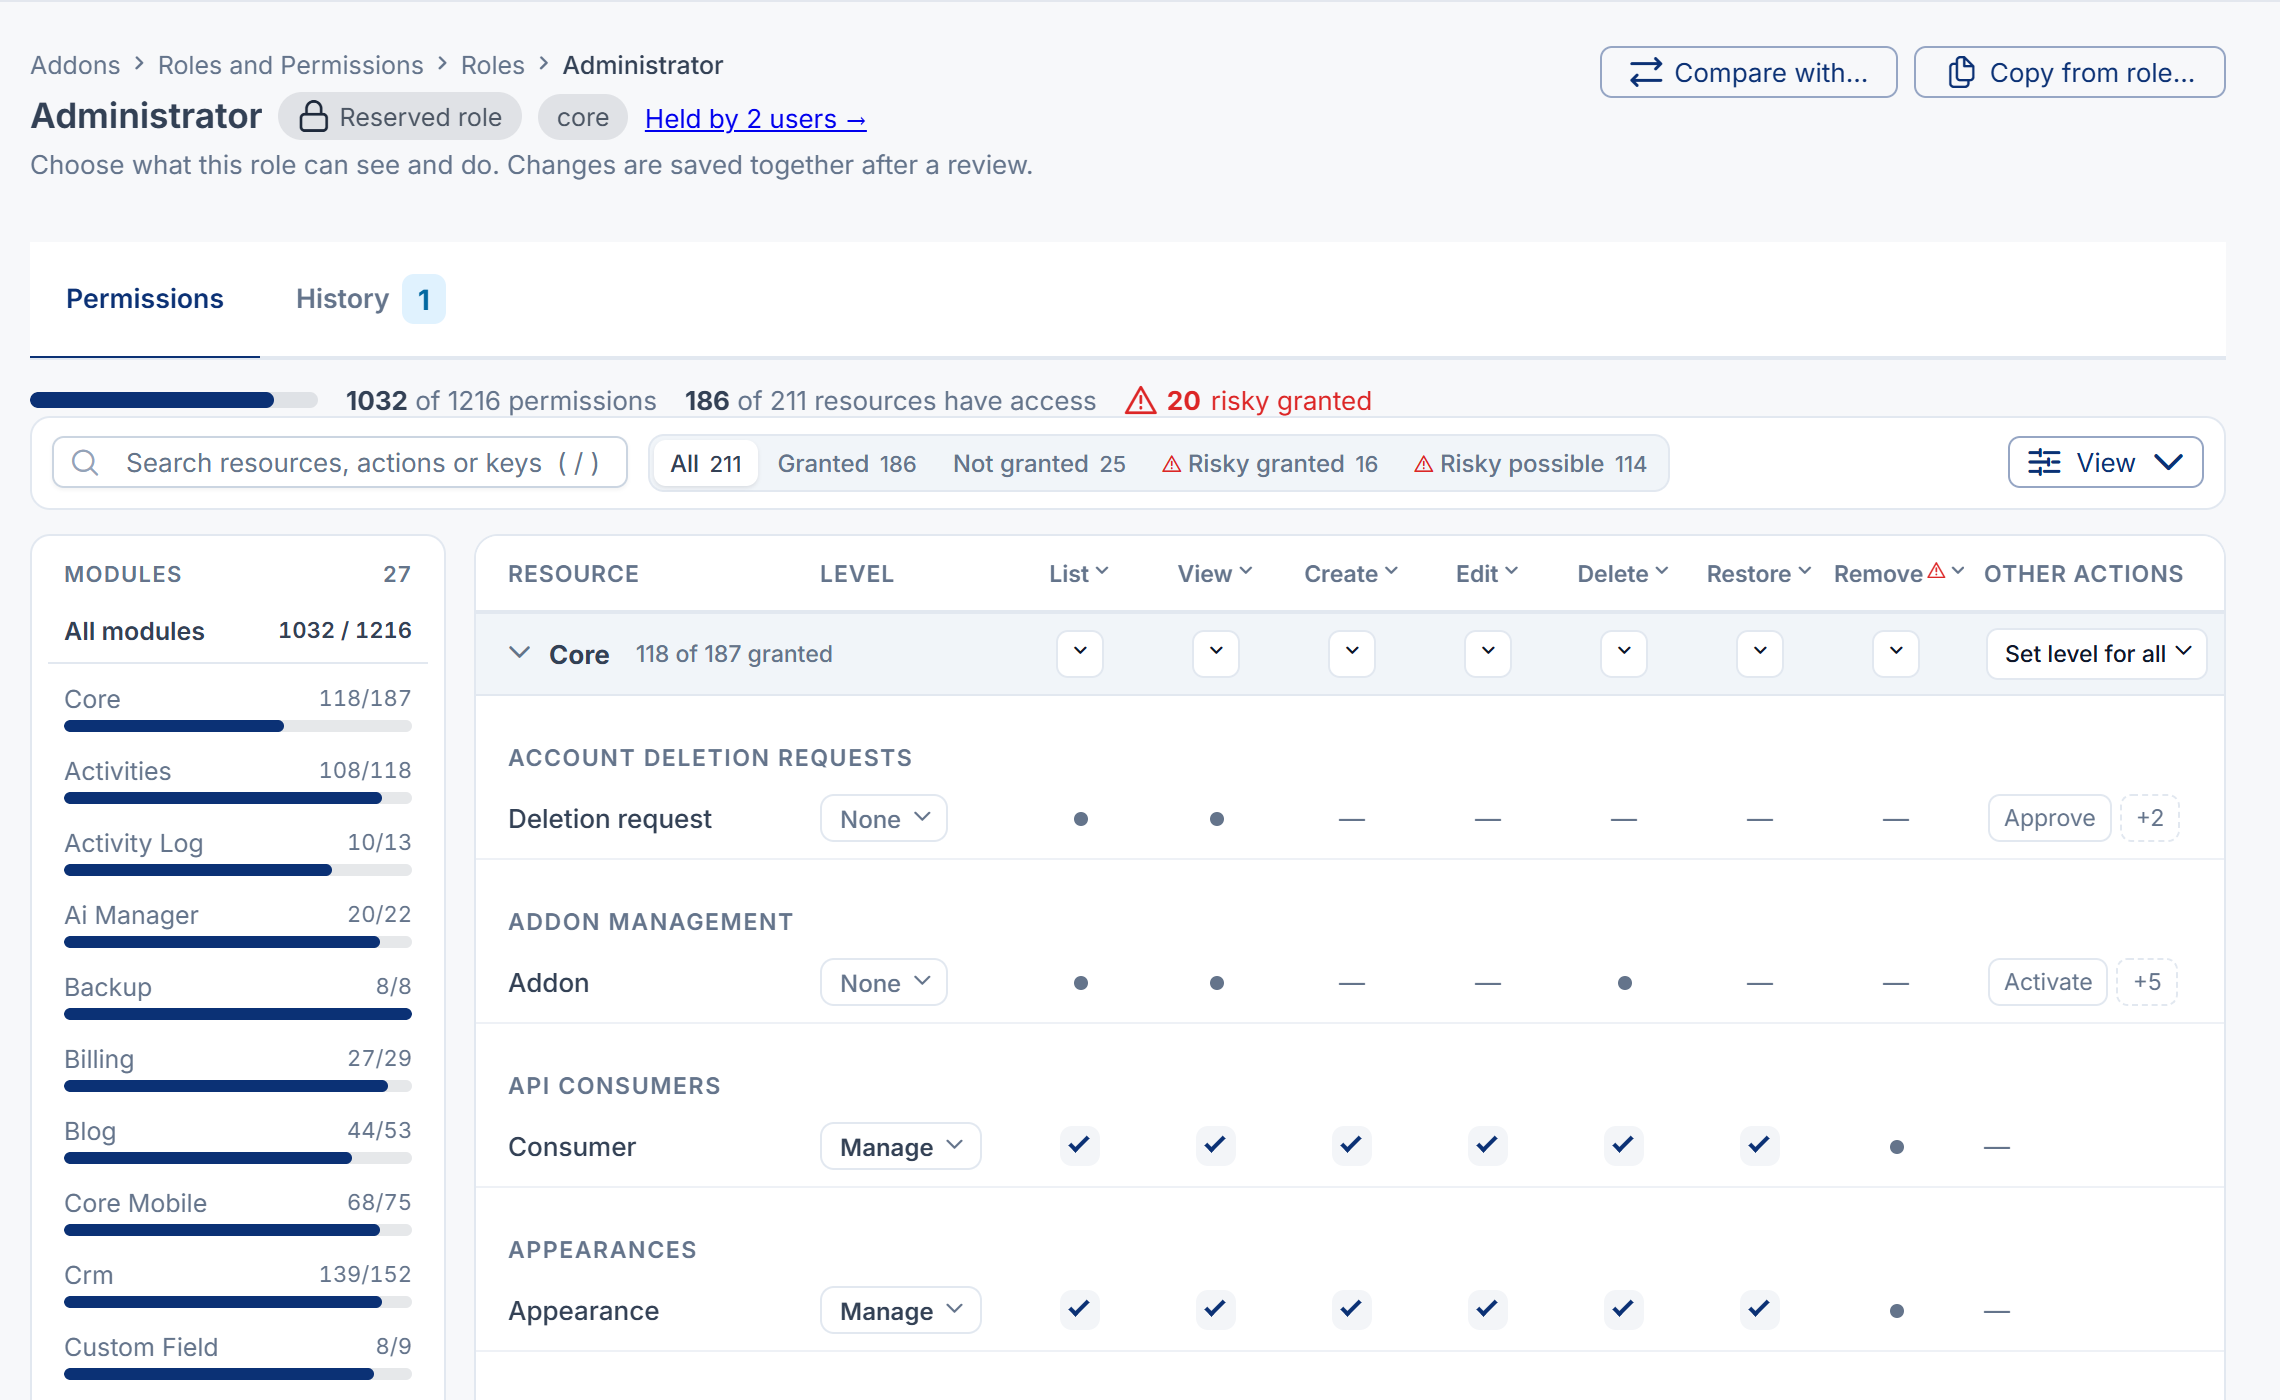
Each row is a Resource, such as User or Support ticket, grouped by module. For each row, set the access you want in one of two ways:
- Open the Level menu and choose None, View (List and View), Edit (View, Create and Edit), Manage (Edit, Delete and Restore) or Full (every action, including Remove and the other actions).
- Or set single actions in the List, View, Create, Edit, Delete, Restore and Remove columns. Each cell cycles Not granted, Own records only and All records. Own records only is offered where the resource has it.
-
For actions that aren't in the standard columns, such as Reply or Close on Support ticket, open the cell under Other actions.
-
To change many rows at once, open a column's menu to grant or revoke that action on every resource shown, or use Set level for all on a module.
When one action needs another, Laramin adds or removes that one too and says so under the row. For example, granting Edit also grants View.
-
Use the search box (Search resources, actions or keys) and the filters, such as Granted, Risky granted and Changed, to find rows. Show technical keys shows each permission's key, such as
feature..core. user.edit -
When you're done, select Review and save in the bar at the bottom. The bar counts your changes and says how many users the role affects.
-
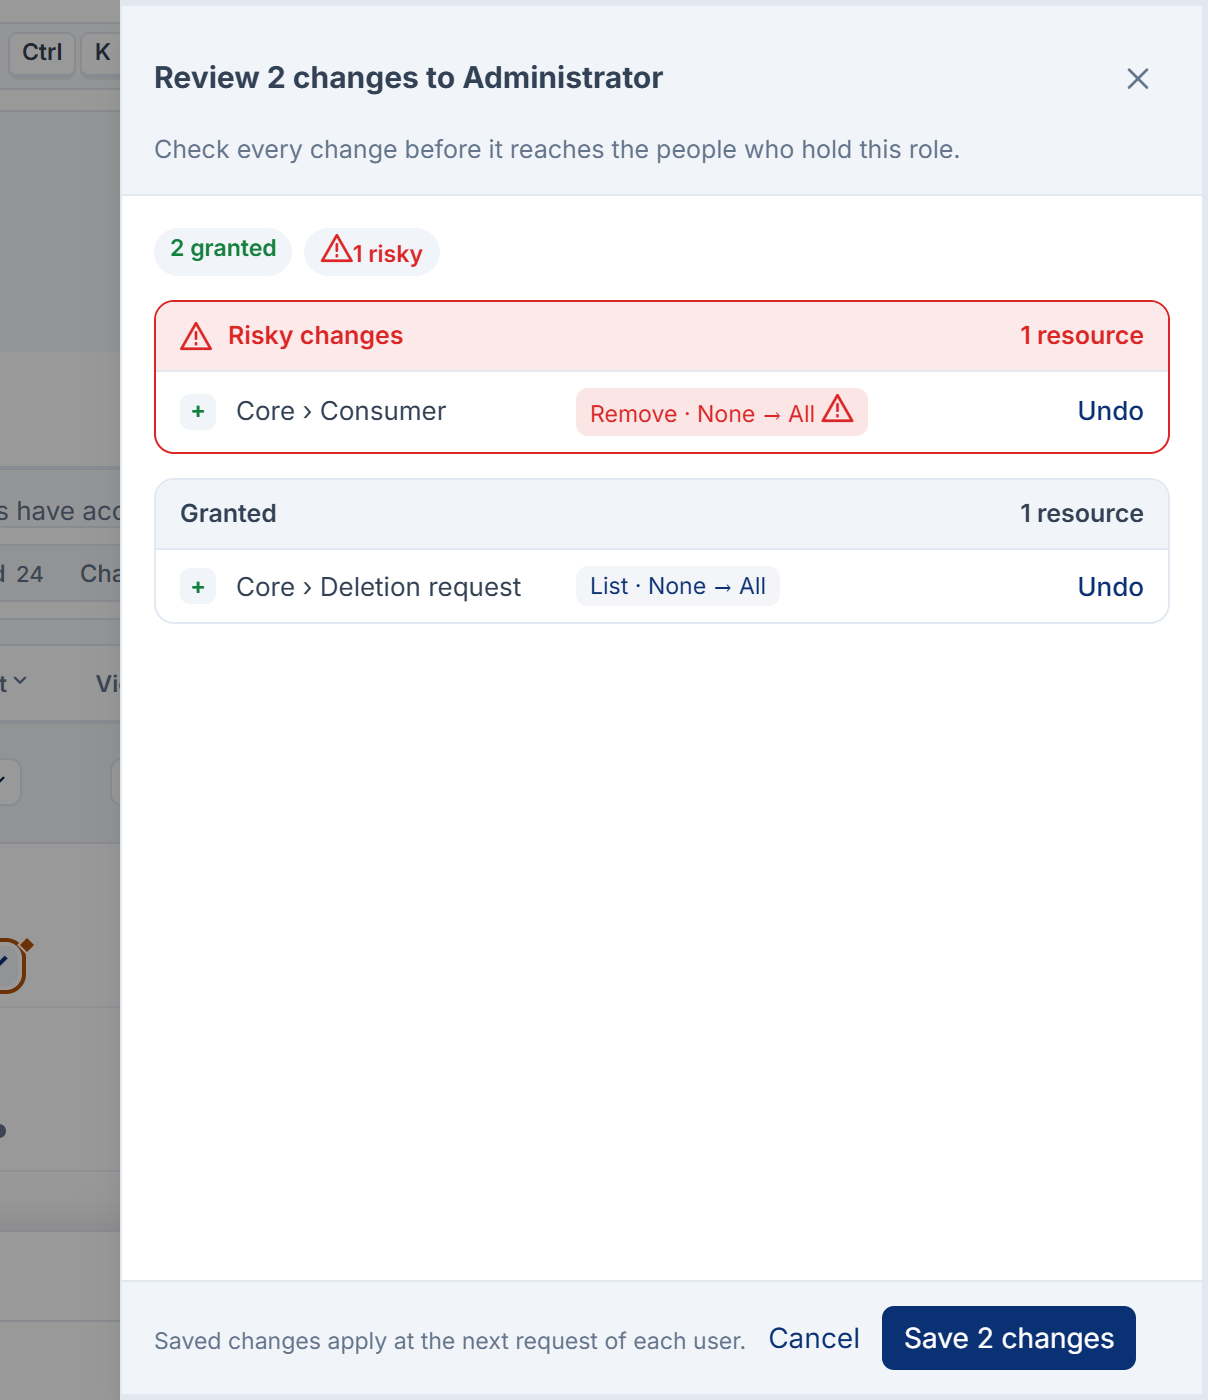
In Review … changes to …, check each line. Risky changes are listed first: actions that remove data, change access or act as someone else.
-
Select Save … changes.
You see Permissions of … saved, with a link to View in History.
Tip: To start from another role's permissions, select Copy from role…, choose the role and select Copy into editor. Nothing is saved until you review and save.
Careful: New roles get nothing automatically. If people with this role should open the Help Center, include Open the Help Center (feature.). If they should enter an experience, such as Administration, give its door permission on the Users form instead. See Create a user.
What happens next
Give the role to people. See Give someone a role. You can also choose it in the Roles field when you create a user. Changes reach each person at their next click.
Thanks. That helps us decide what to write next.
Thanks for telling us what was missing.
You already answered for this article today. Thanks.
We got a lot of answers from your network just now. Try again in a few minutes.
We couldn't send that. Check your connection and try again.
Links in this article
Printed from help.laramin.in. The online article may have changed since.