Choose which experiences a user can enter
Decide, workspace by workspace, which experiences each person can open, and change how an experience looks in a workspace.
Why this step
The experience decides what the person's menu and home page look like. Give only the ones their job uses.
Today you only need:
- Applies to
- Core 12.2 and later
- Who can do this
- Administrator, Platform owner
- Permission
feature.core. user.edit - Where
- Users Accounts › Users
Before you start
- You need Edit User (
feature.), or Create User when you're adding someone new.core. user.edit - Switch to the workspace you want to give access in. The form changes access only in the workspace you're working in, and names it: "Experiences in …". In All Workspaces, it says Choose a workspace to manage which experiences this person may enter. See Switch workspace.
- The person must be an active member of the workspace to enter it at all. See Create a workspace.
- You can only give access to experiences you can enter yourself in this workspace.
Steps
-
In the menu, open Users Accounts › Users.
-
Open the person's row actions menu (Row actions) and select Edit.
-
Select Next: Profile, then Next: Access.
-
Under Experiences in …, tick each experience the person should be able to enter. Untick any they shouldn't.
-
Select Save.
Some rows can't be changed, and say why:
| What the row says | What it means |
|---|---|
| Granted by the role "…" | One of the person's roles gives access. Unticking it wouldn't change anything, so it's locked. Change their roles instead. |
| You cannot enter this experience yourself | You can't give access you don't have. |
| This experience cannot be assigned yet | The module hasn't set the experience up for individual access. |
| Granted outside this workspace | The access comes from somewhere other than this workspace. |
If the person is a super admin, the form says Super-admins can enter every experience. instead of showing a list.
What happens next
The person can enter the experiences you ticked in this workspace. If they have more than one, they can switch with View in the header, and Laramin asks which one to open when they sign in. If they have none, they see Nothing to open here after signing in.
Change how an experience looks in a workspace
Experiences come from modules, so you can't create one in Laramin. You can change how one is presented in a workspace.
-
Switch to the workspace. If you're in All Workspaces, Laramin says Choose a workspace before editing what an experience looks like.
-
In the menu, open Users Accounts › Experiences.
-
Select the pencil (Edit) on the experience's row.
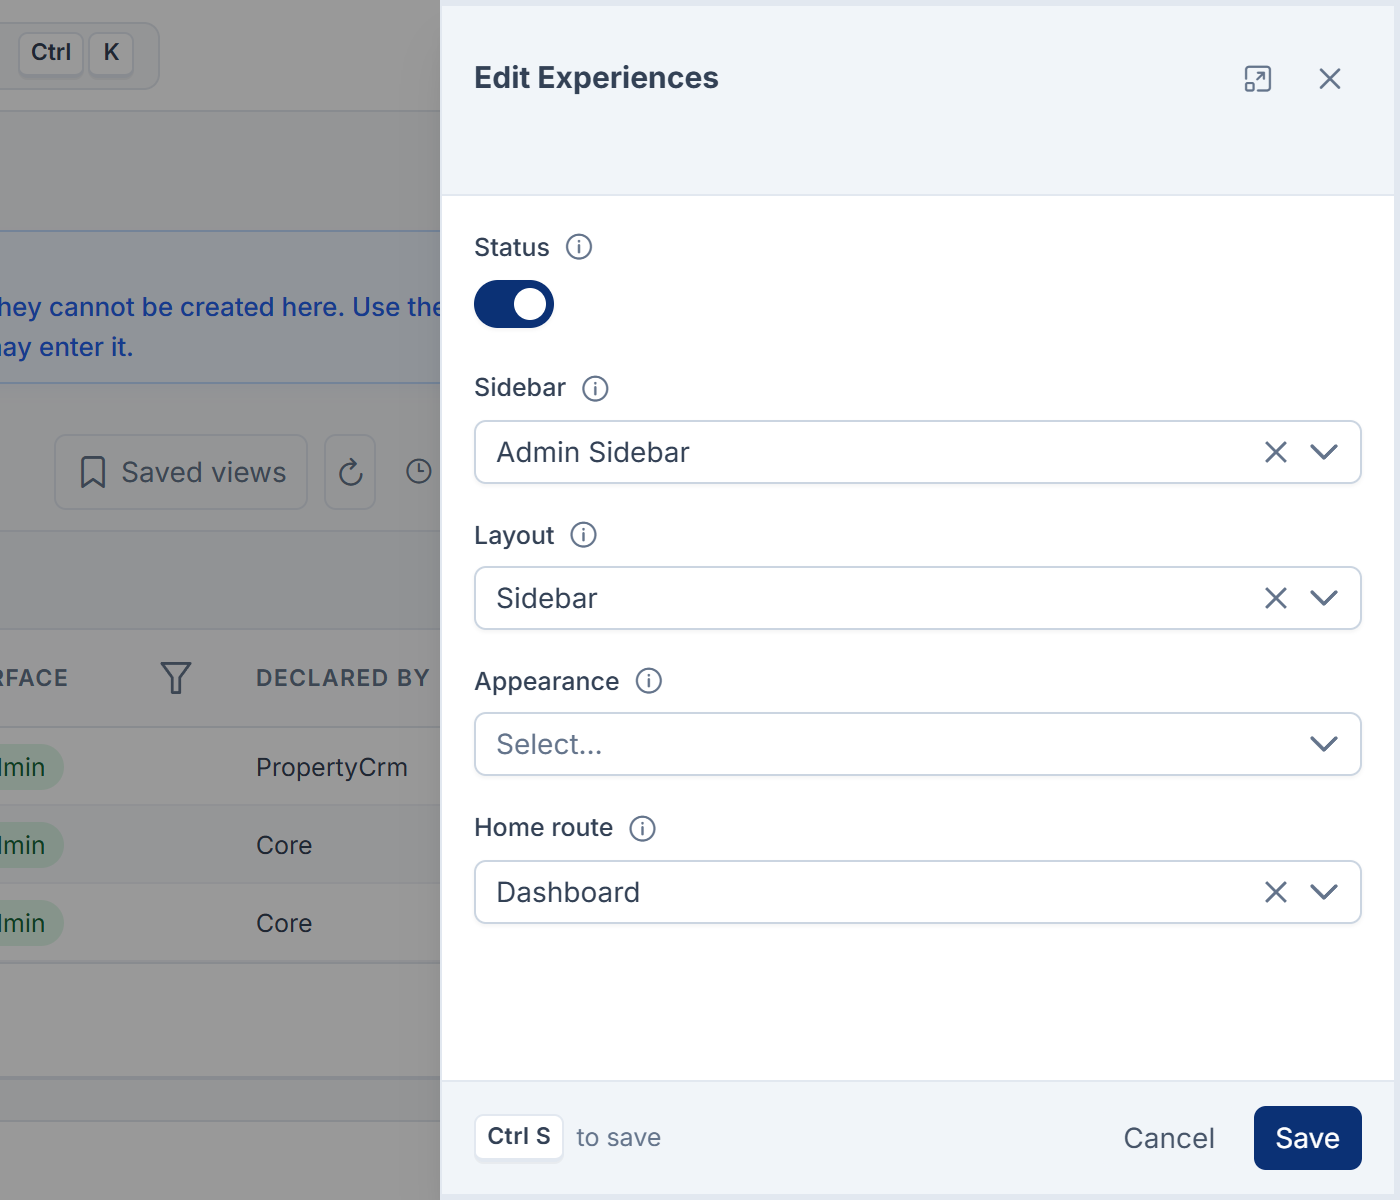
-
Change any of these:
- Status: Available or Unavailable in this workspace. Platform Administration can't be switched off.
- Sidebar, Layout and Appearance: leave a field blank to use the default.
- Home route: the page people land on. Choose it from the menu's destinations.
-
Select Save.
You need Edit Experience Presentation (feature.) to do this. The built-in Administrator role doesn't include it.
Links in this article
Printed from help.laramin.in. The online article may have changed since.