Check what was sent
See your delivery numbers on the Notification Manager dashboard, send a test from the Test Center, look up each message in Delivery Logs, and get delivery reports back from Twilio, Msg91 and WhatsApp.
- Applies to
- Notification Manager 1.4 and later
- Who can do this
- Platform owner
- Permission
feature.nm. log.list - Where
- Notification Manager › Logs
On this page
Before you start
- To open the dashboard, you need View Notification Event (
feature.). To open Delivery Logs, List Notification Logs (nm. event.view feature.).nm. log.list - To send from the Test Center, you need Send Test Notification (
feature.).nm. template.send - To clear logs, you need Clear Notification Logs (
feature.).nm. log. clear - To set up delivery reports, you need View Providers & Settings (
feature.), and access to your provider's own dashboard.nm. provider.view
Steps
Look at the dashboard
-
In the sidebar, open Notification Manager › Dashboard.
-
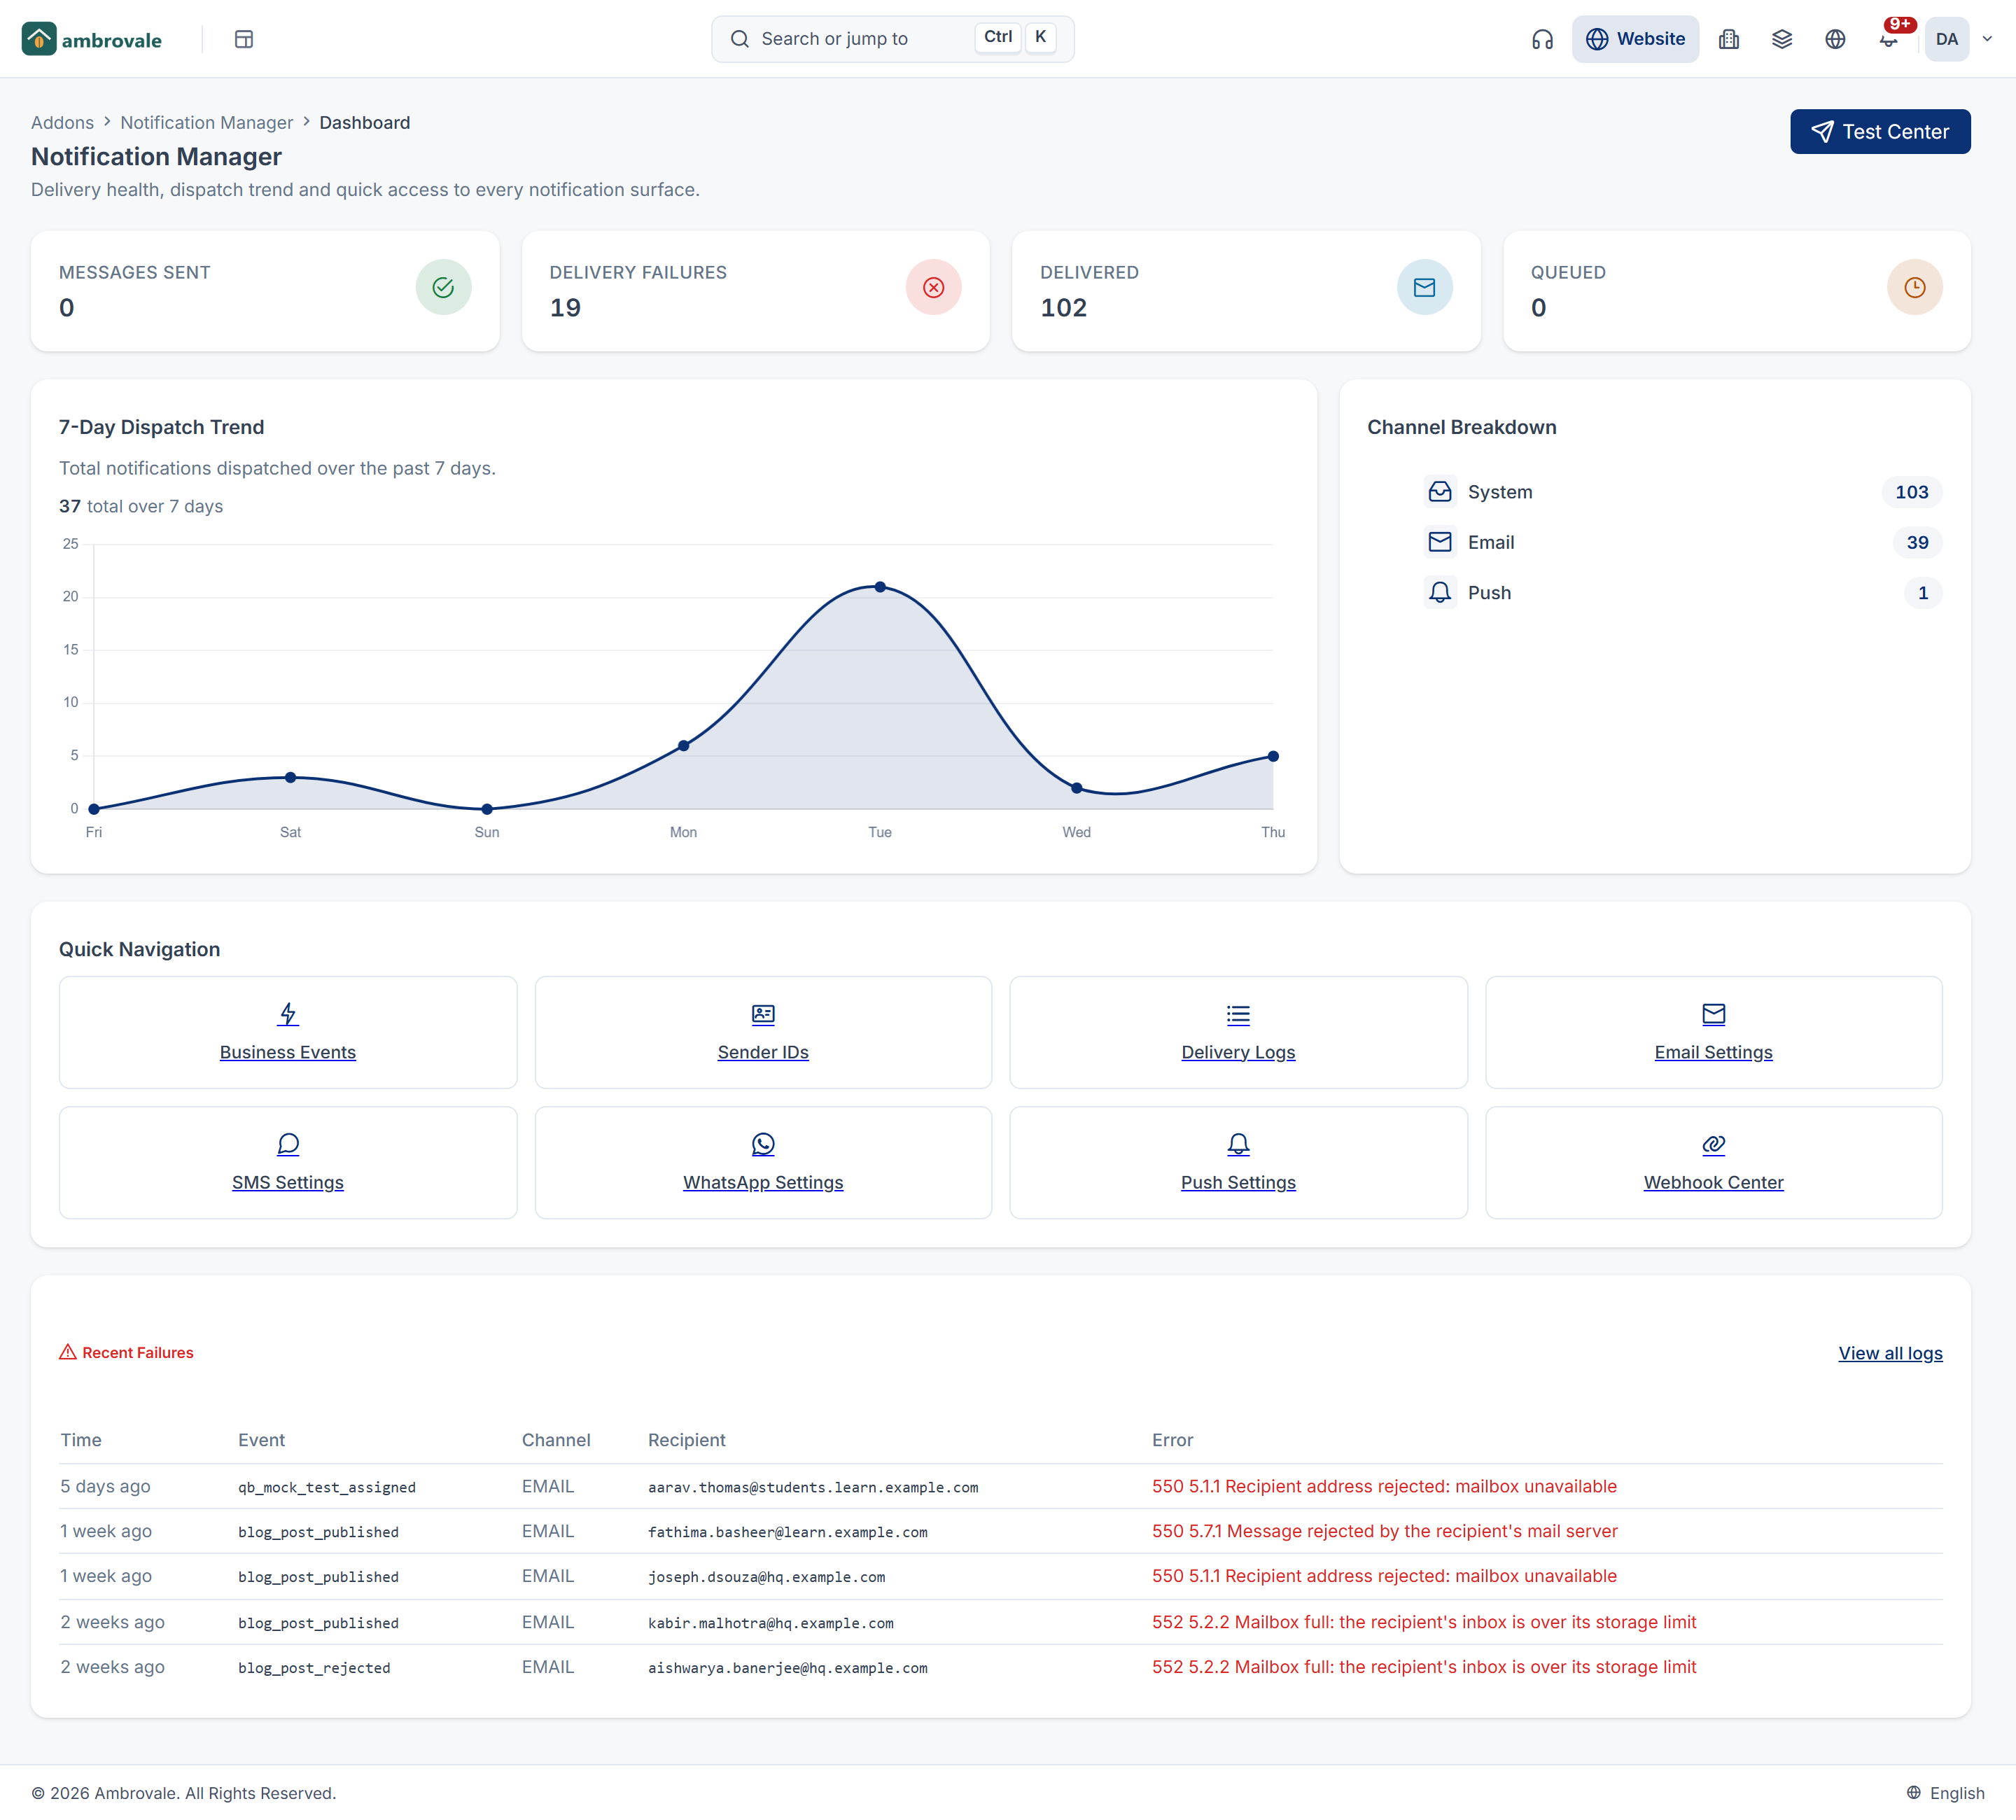
Read the counters: Messages Sent, Delivery Failures, Delivered and Queued. They count every row in Delivery Logs, not only recent ones.
-
Check 7-Day Dispatch Trend for how many messages went out on each of the last seven days, in your workspace's time zone, and Channel Breakdown for each channel's share.
-
If any messages failed, Recent Failures lists the last five, with the error. Select View all logs to open Delivery Logs.
Quick Navigation links to every Notification Manager screen.
Messages Sent counts messages a provider accepted. Once the provider reports them delivered, they move to Delivered. A message waiting in the queue isn't logged until it's sent, so Queued always shows 0.
Send a test from the Test Center
The Test Center fires a whole event, as if it really happened. Use it to check every channel of an event at once.
-
On the dashboard, select Test Center.
-
In Event, choose the event.
-
In Recipient (email / phone / token), enter where to send it, for example
you@example.com. -
Optionally, in Variables (JSON), enter values for the message, for example
{"LEAD_NAME": "Sample Lead"}. -
Select Send Test.
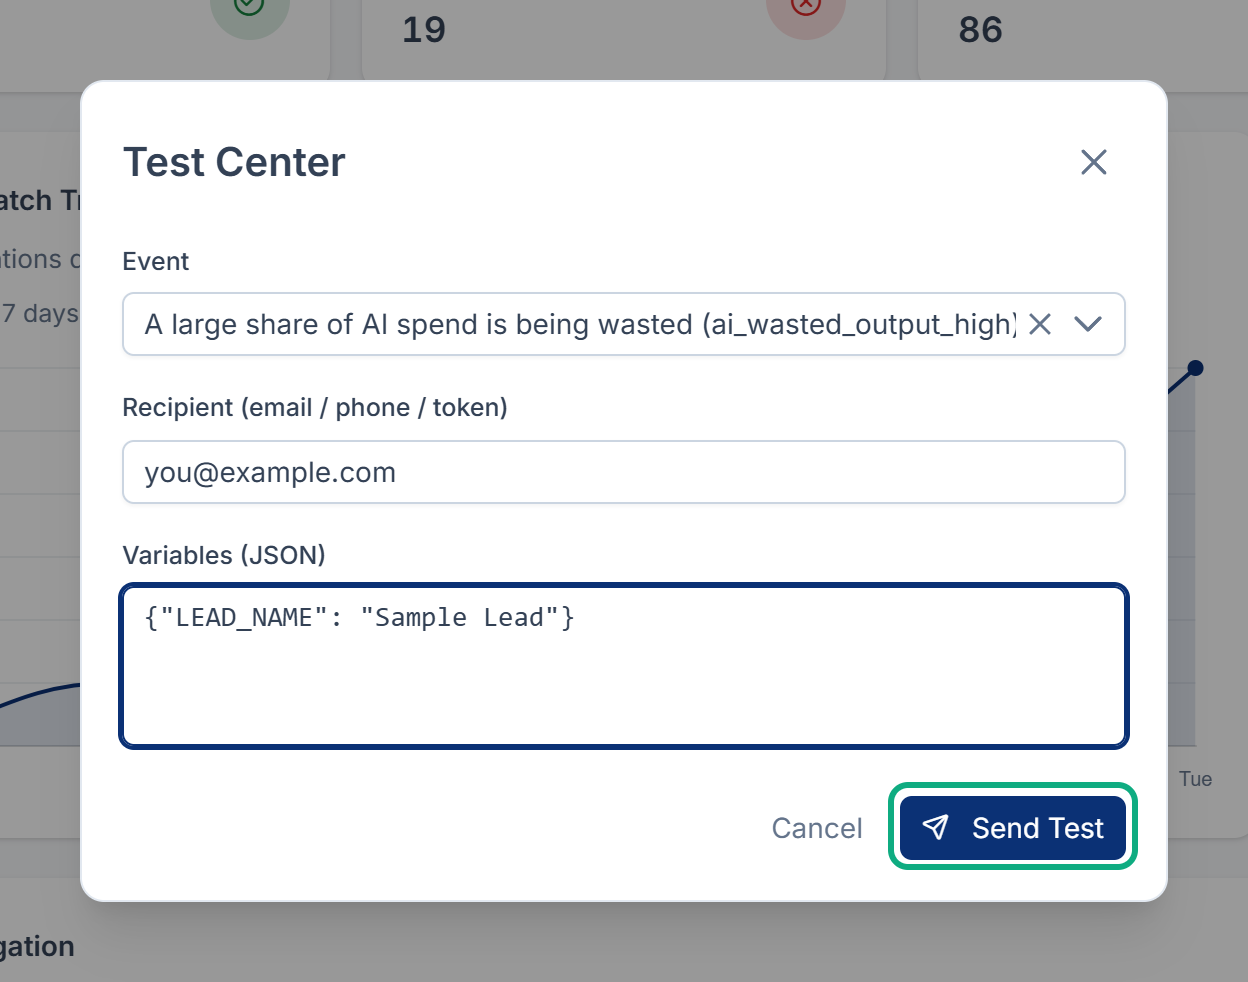
You see Test notification dispatched. Check Delivery Logs for the result.
Unlike a test from the Template Builder, the Test Center sends only approved templates with Enable Dispatch on. It sends the same recipient to every channel, so an email address fails on SMS and WhatsApp, and in-app messages need a user. Expect Failed rows for those channels.
Look up a message in Delivery Logs
-
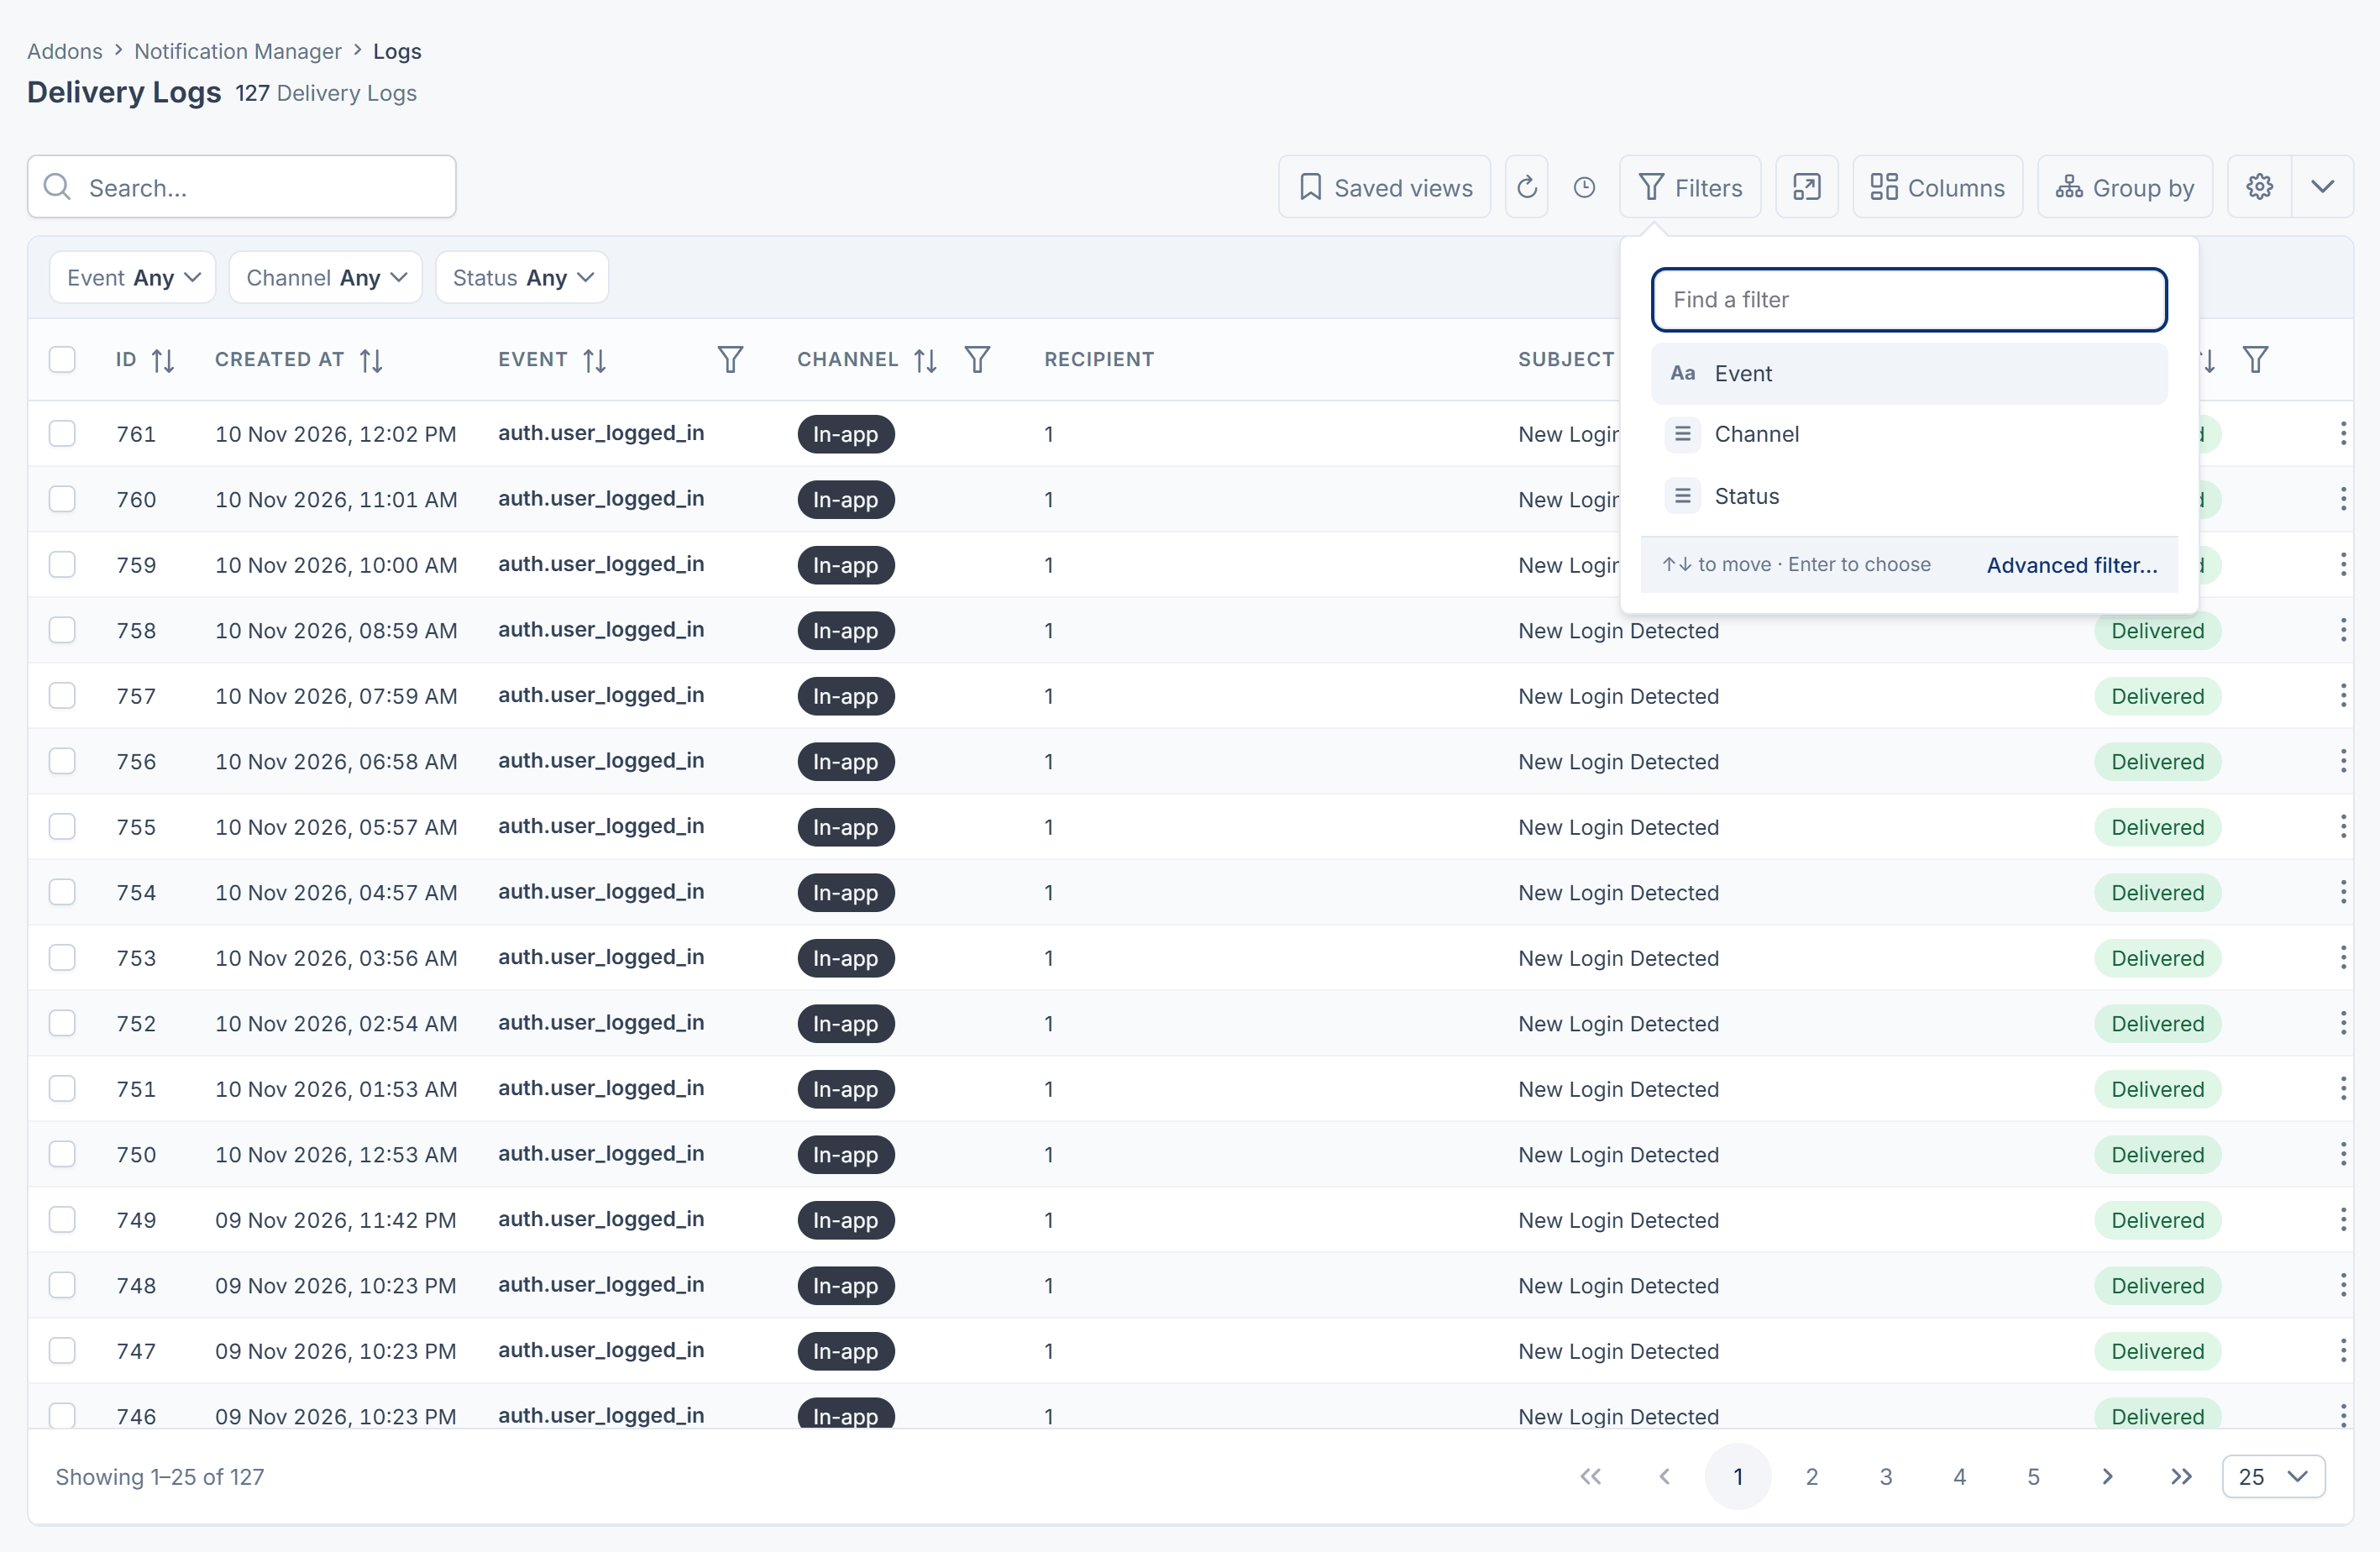
In the sidebar, open Notification Manager › Logs. The newest messages are at the top.
-
To narrow the list, search by Event or Recipient, or filter by Event, Channel or Status.
-
Select a row to see all of it:
- Delivery: the time, event, channel, status, recipient, Language and Provider Message ID.
- Message: the subject, the Rendered Body as it was sent, and the Variables used.
- Diagnostics: the Error Message, if any, and Attempts, the number of providers tried.
| Status | Meaning |
|---|---|
| Sent | The provider accepted the message. |
| Delivered | In-app: it's in the person's bell. SMS or WhatsApp: the provider reported it delivered. |
| Read | WhatsApp reported that the person read it. |
| Failed | It couldn't be sent, or the provider reported it undelivered. Error Message says why. |
skipped | It wasn't sent because the template isn't approved. |
Email and push stay at Sent, because those providers don't send reports back.
Get delivery reports from your SMS and WhatsApp provider
To see Delivered, Read and late failures for SMS and WhatsApp, give your provider the address to report to.
-
In the sidebar, open Notification Manager › Settings › Webhook Center.
-
Find your provider's card: Twilio Status Callback URL, Msg91 DLR Webhook URL or Meta WhatsApp Webhook URL.
-
Select Copy URL. The address looks like
https://laramin.example.com./api/ notification- manager/ webhook/ twilio 
-
Paste it in your provider's dashboard, where the card says:
- Twilio: the Status Callback URL of your number or messaging service.
- Msg91: the delivery report (DLR) webhook in your account. The address ends in a secret for your Laramin, so keep it private. In Msg91's Webhook (New), you can send the secret in an
X-Webhook-Tokenheader instead. - Meta: your app's WhatsApp webhook Callback URL. Enter the verify token shown on the card, and subscribe to the messages field.
-
Make sure Laramin can check the reports:
- Twilio: the Auth Token is saved under SMS Settings.
- Meta: the App Secret is saved under WhatsApp Settings. It's in your Meta app, under App settings › Basic.
Laramin checks every report before it changes a log row. A report it can't check is refused and changes nothing. If a card on Webhook Center shows a warning, that provider's reports are refused until you save what the warning names.
[Confirm: Msg91 delivery reports may not update the log in Notification Manager 1.5.0. The card asks Msg91 for requestid, and Laramin reads a differently named field. Check delivery in your Msg91 account.]
Clear old logs
Laramin keeps every log row until you clear it.
-
In Delivery Logs, select the rows, or select all rows that match your filter.
-
Select Clear.
-
Type
DELETEand confirm.
The rows are deleted for good, and the dashboard counters go down.
What happens next
If a message is missing or Failed, see A notification wasn't sent or didn't arrive.
Thanks. That helps us decide what to write next.
Thanks for telling us what was missing.
You already answered for this article today. Thanks.
We got a lot of answers from your network just now. Try again in a few minutes.
We couldn't send that. Check your connection and try again.
Links in this article
Printed from help.laramin.in. The online article may have changed since.