Add a property
List a property: who owns it, what's on offer and at what price, its details and location, its photos, and whether it shows on your website.
- Applies to
- Property CRM 5.0 and later
- Who can do this
- Team member
- Permission
feature.pcrm. property. create - Where
- Property CRM › Properties
On this page
Before you start
- You need
feature.. Property CRM Admin, Manager and Agent have it.pcrm. property. create - Work in your business's workspace, not All Workspaces. See Switch workspace.
- The owner must be a client with the Seller role. If they aren't in Laramin yet, you can create them from the form.
- Have the photos ready. The Featured Image leads the listing, so pick your best one.
Steps
The form has several steps, listed down its side. Only the first step has required fields. Once they're filled, you can select Save from any step.
Listing Overview
-
In the Property CRM sidebar, open Properties. In the Platform Administration sidebar, it's Property CRM › Properties.
-
Select Create. The form opens on Listing Overview.

-
In Owner, choose the owner. If they're new, select New owner, enter their Full name and Mobile, and select Create.

-
Enter a Title, for example "3 BHK apartment near the lake".
-
Choose the Category (Residential, Land / Plot or Commercial), then the Property Type. The types offered depend on the category.
-
Choose the Purpose: Sale, Rent, Lease or Joint Venture. The money fields below change to suit it. For example, a rental asks for a deposit.
-
Check Property From, which is Direct Client unless the listing came through a builder, mediator, promoter or investor.
-
Leave Status at Available.
-
Choose the Assigned agent, the person who looks after this listing.
-
Under Pricing & Description, enter the Price: the sale value, or the monthly rent for a rental or lease. Add Price / Unit, Negotiable and a Description if you have them.
-
Under Listing & Visibility, check Show on website. It's on for a new property. Turn it off to keep the listing off your website.
-
Optional: turn on Featured Listing or Verified Listing, or set Listing Expires On.
The other steps
-
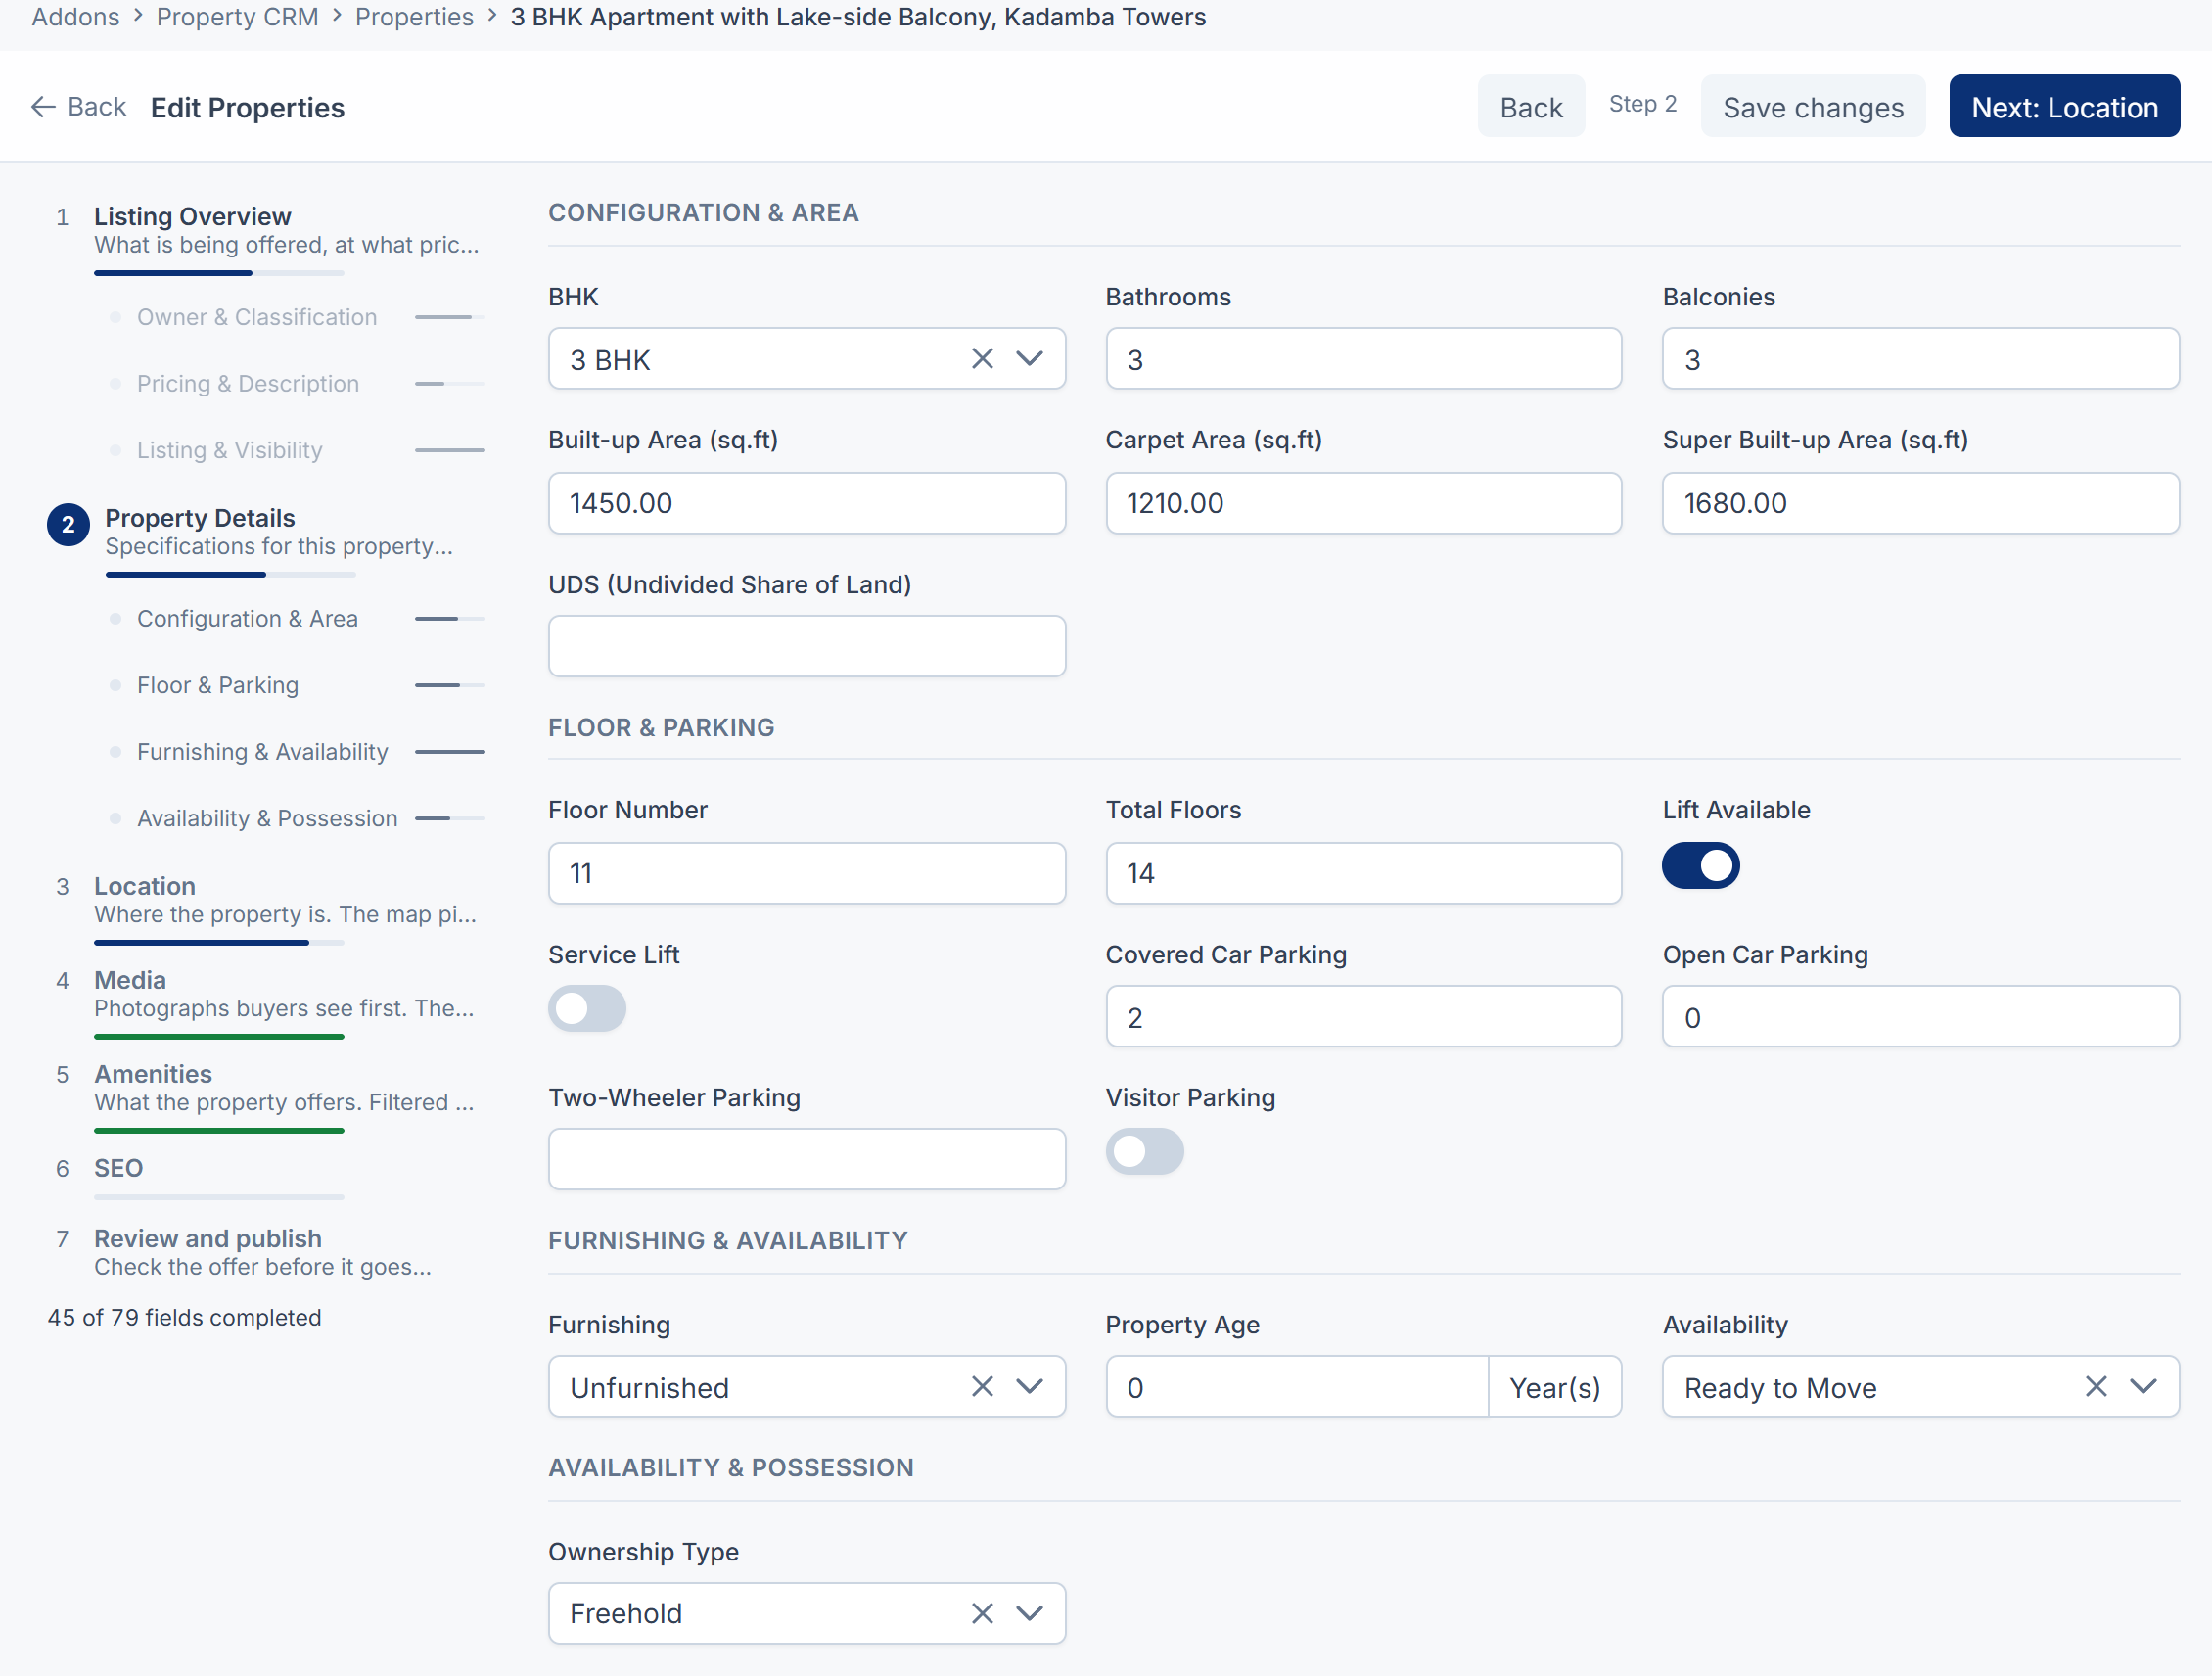
On Property Details, fill in what applies to this type: for example Configuration & Area and Floor & Parking for a flat, or Boundaries & Frontage for a plot.
-
On Location, enter the Address, Area / Locality, City, State and Pincode. Under Pin the location, drag the marker to the exact spot.
-
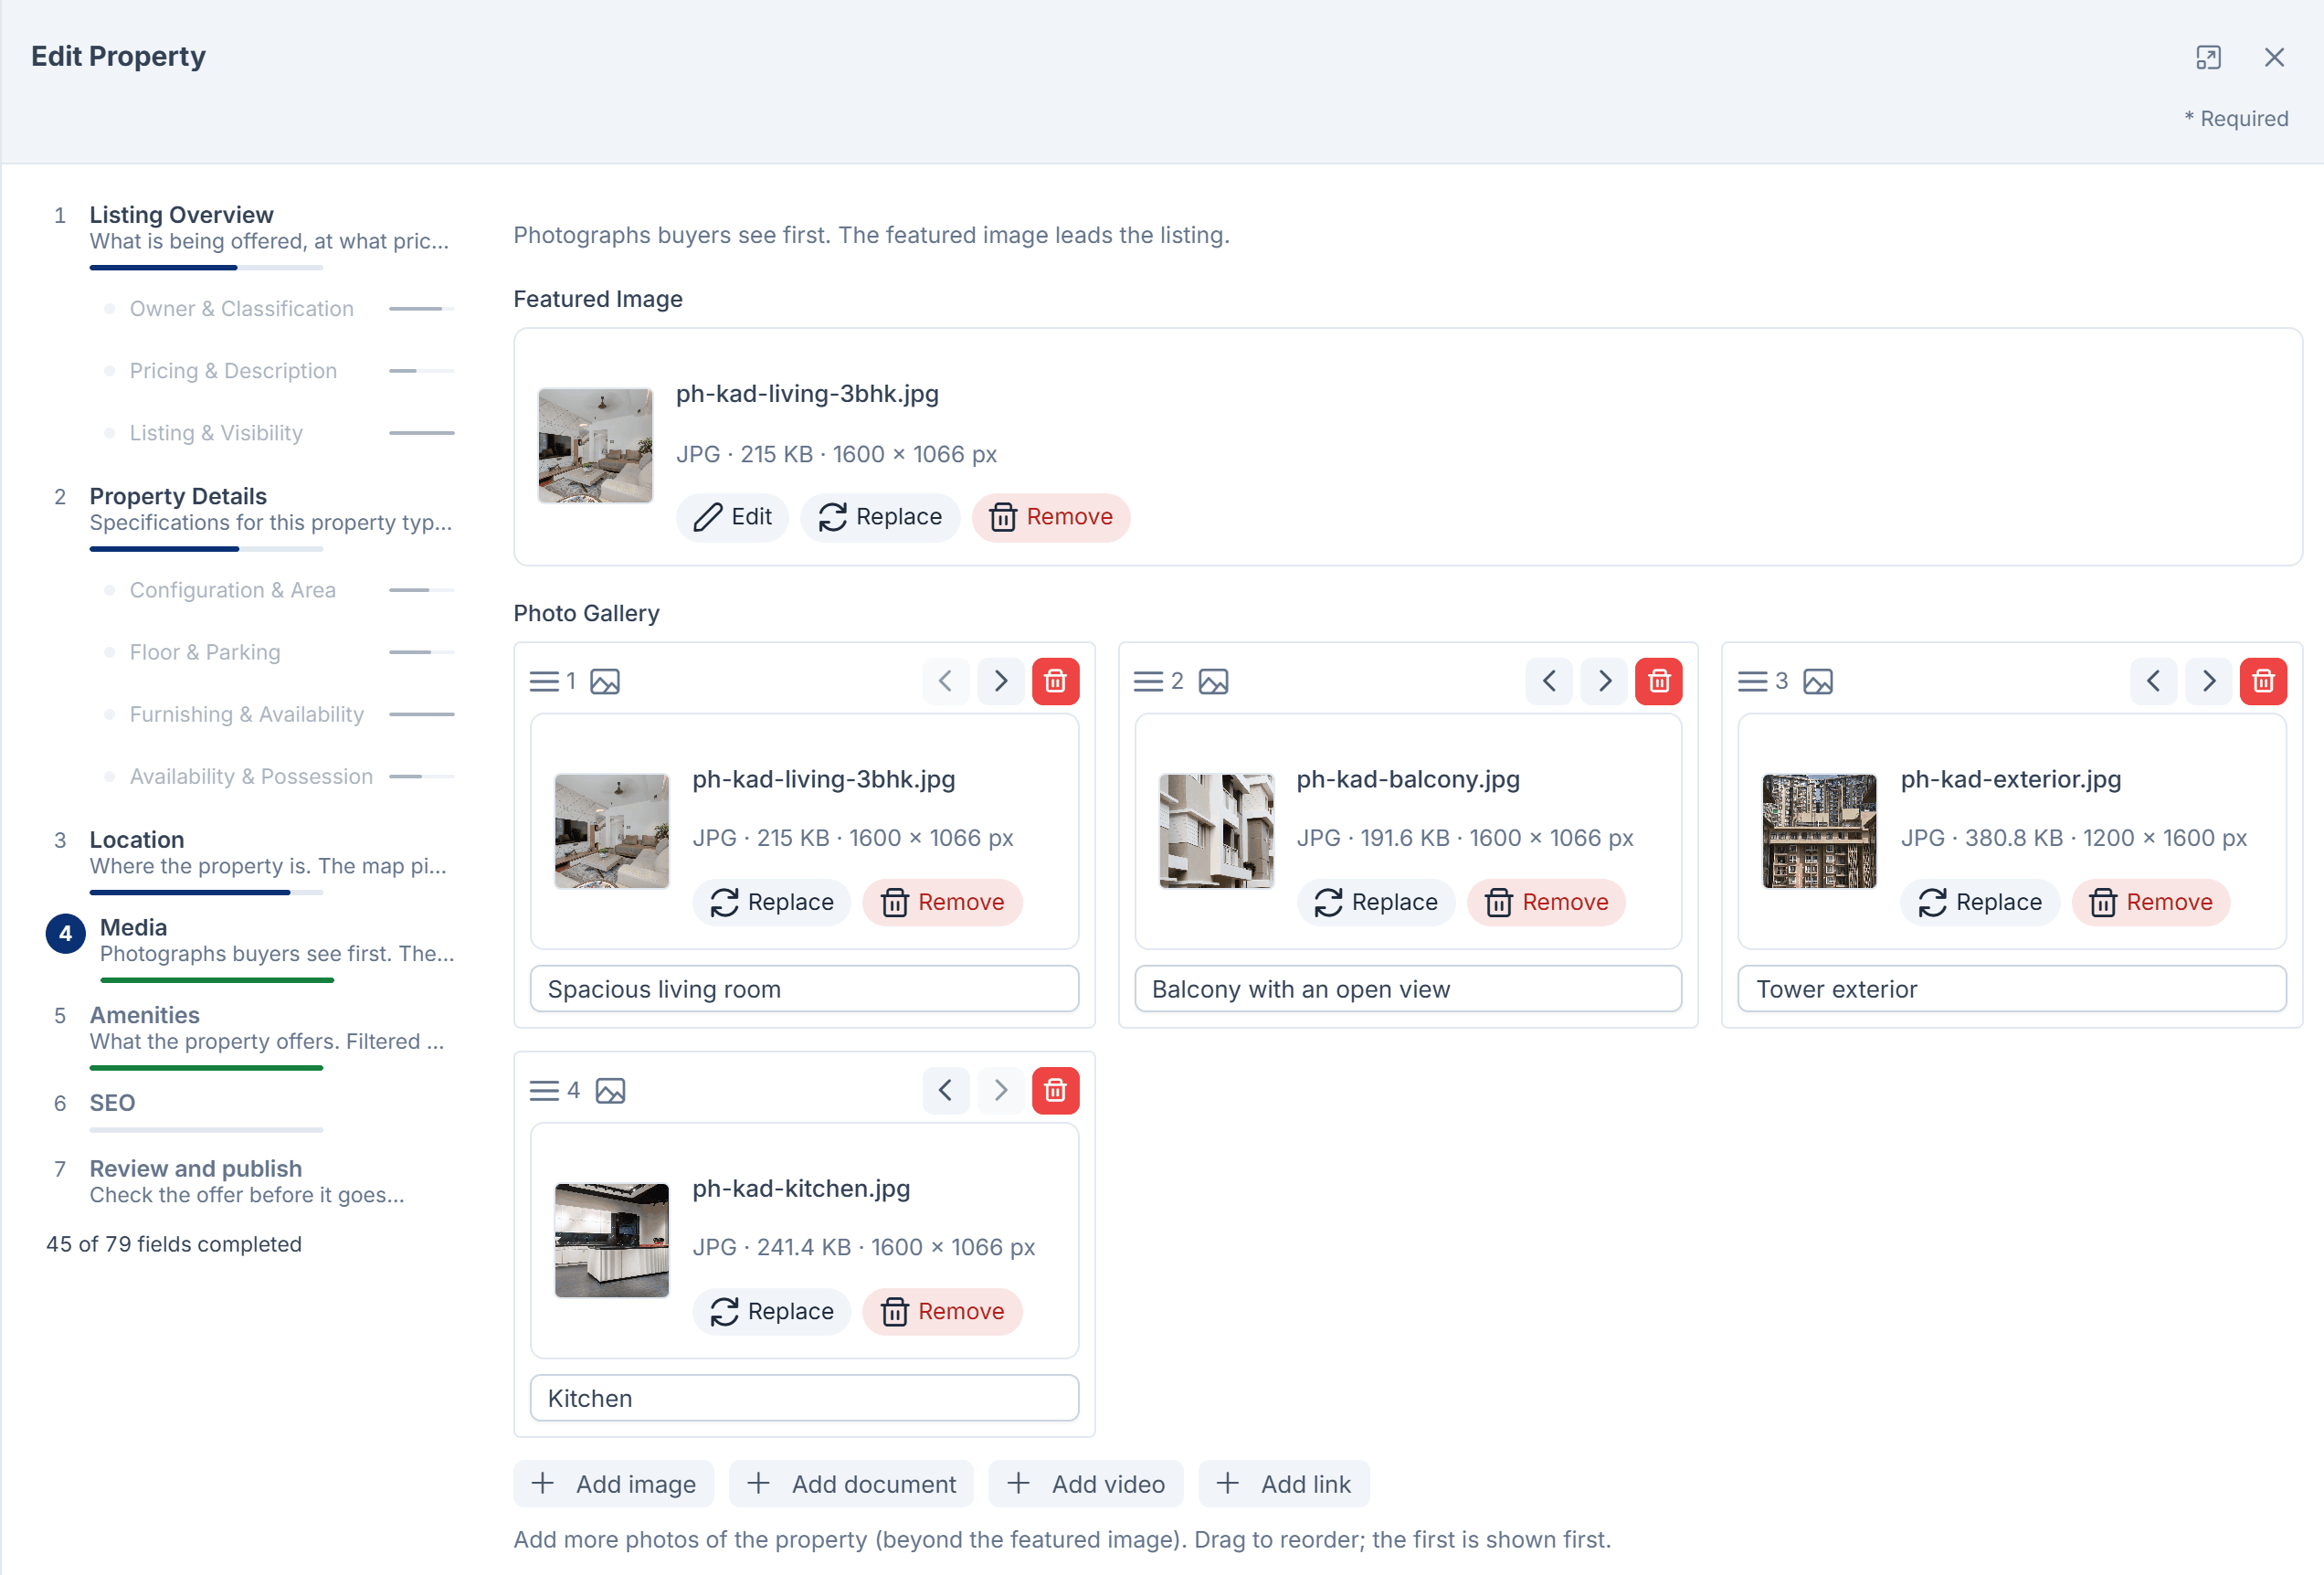
On Media, upload the Featured Image. Add more photos under Photo Gallery, and drag them into the order buyers should see them. You can also paste a YouTube or Vimeo link for a walk-through video.
-
On Amenities, tick what the property offers. If one is missing, type it and add it as a custom amenity.
-
If your Laramin has the SEO add-on, an SEO step lets you set how the listing appears in search results.
-
On Review and publish, check the offer, the location and the visibility.
-
Select Publish listing.
What happens next
The property gets a code, such as PROP-000012, and appears in the Properties list. Laramin also gives it a Public URL. That address never changes once it's issued, even if you change the title.
Open the property to see its Completeness, its matching requirements and its follow-ups. When a buyer commits, use Place under offer and then Complete transaction on the property: you can't set Under Offer, Sold or Rented by editing the status.
Careful: Carpet area can't be bigger than the built-up area, and the floor number can't be higher than the building's total floors. Laramin refuses to save until these agree.
Thanks. That helps us decide what to write next.
Thanks for telling us what was missing.
You already answered for this article today. Thanks.
We got a lot of answers from your network just now. Try again in a few minutes.
We couldn't send that. Check your connection and try again.
Links in this article
Printed from help.laramin.in. The online article may have changed since.