Add a person or company
Add a person, company or group to your Laramin's shared directory, so every business that deals with them works from one record.
- Applies to
- Organization 3.1 and later
- Who can do this
- Administrator
- Permission
feature.org. party. create - Where
- Organization › Parties
On this page
Before you start
- You need
feature.. In the role editor it's Create on the Party row.org. party. create - Work in the workspace of the business that deals with this party, not All Workspaces. Otherwise there's no New Party button. See Switch workspace.
- Search the Parties list for the name first. If the party is already there, you don't need a new record. The list's search looks at names and party numbers, not phone numbers or email addresses.
Tip: If you use Property CRM, add clients there instead: Property CRM › Clients › New Client finds the person in the directory by mobile number, or adds them for you. See Add a client.
Steps
-
Open Organization › Parties.
-
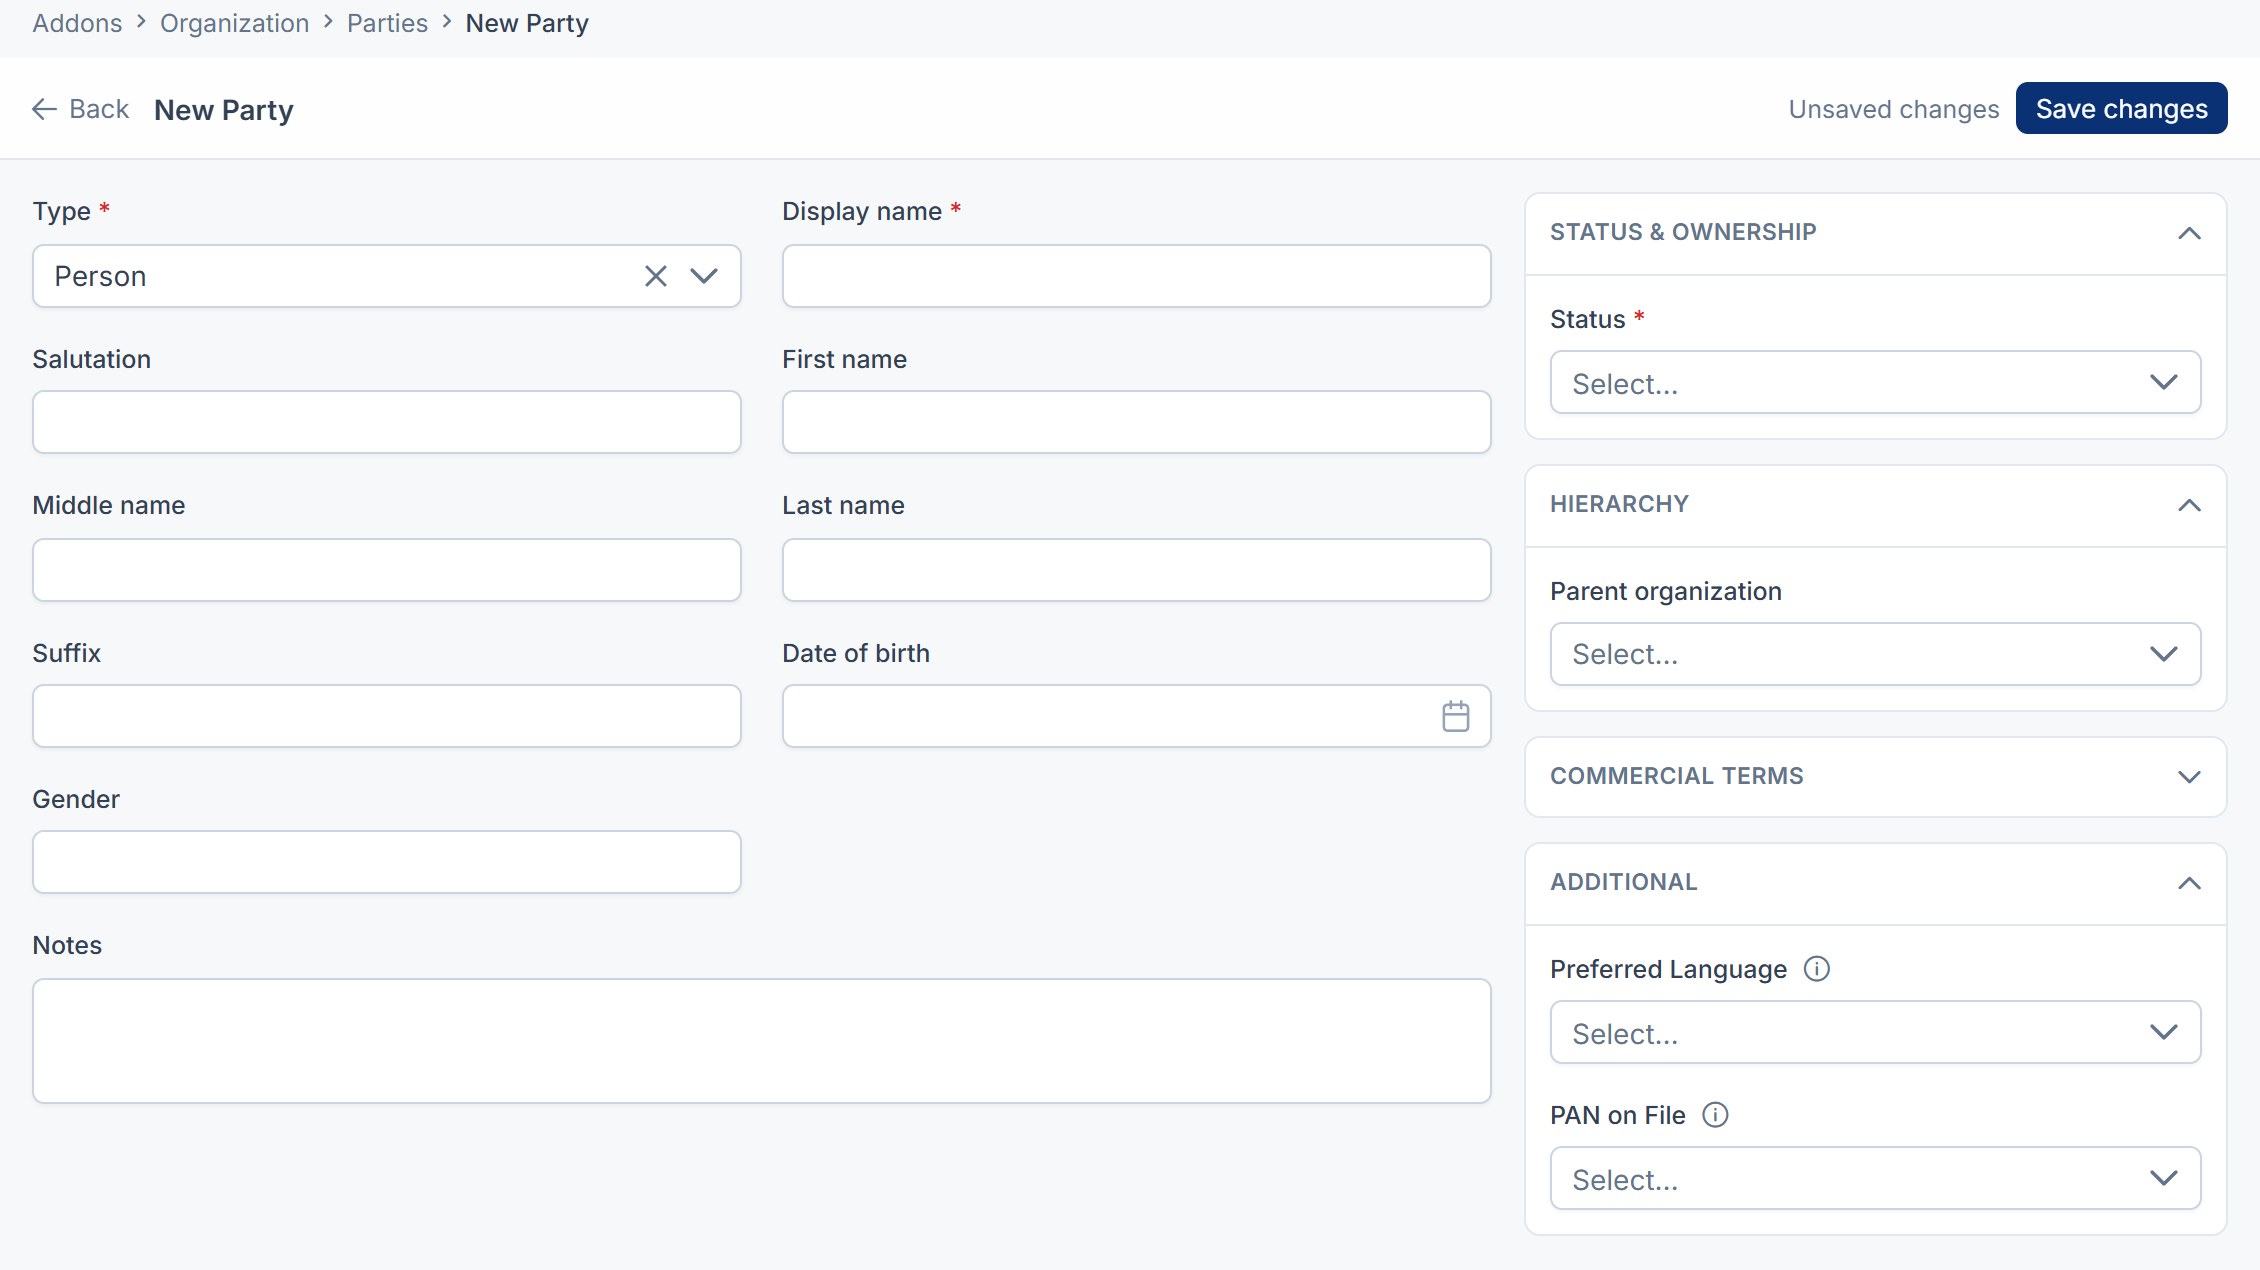
Select New Party. The form opens as a page.
-
Under Identity, choose the Type: Person, Organization or Group. You can't change it after you save.
-
Enter the Display name: the name people will search for and see in lists.
-
Fill in the other names that fit the type:
- For a person, add Salutation, First name, Middle name, Last name and Suffix if you know them. If you leave the name parts empty, Laramin splits the display name into first, middle and last name for you.
- For an organization or group, add the Legal name, the name on invoices, and the Trading name. If you leave Display name empty, Laramin uses the legal name.
-
For a person, add the Date of birth and Gender if you need them.
-
Under Status & ownership, leave Status at Active.
-
If the party is part of a larger company, under Hierarchy choose the Parent organization, then Relationship to parent: Subsidiary, Branch, Site or Division.
-
Under Commercial terms, enter the Default language code if the party prefers another language, for example
hi. -
Fill in any fields under Additional. These are your Laramin's custom fields for parties.
-
Add any Notes.
-
Select Save.
Laramin says Party created.
What happens next
The party gets a party number, such as PTY-00042, and appears in the Parties list. It now takes part in your current workspace, with an empty Business Profile.
A new party has no contact details and no role yet. Next:
- Add contact details and addresses.
- Give the party a role, such as Customer.
- Set your business's terms, such as payment terms and who owns the relationship.
To change the party later, open its row actions menu and select Edit. Changes to the name, notes, status and parent are shared: every business that deals with the party sees them.
Every field and option is listed in Organization fields and options.
Thanks. That helps us decide what to write next.
Thanks for telling us what was missing.
You already answered for this article today. Thanks.
We got a lot of answers from your network just now. Try again in a few minutes.
We couldn't send that. Check your connection and try again.
Links in this article
Printed from help.laramin.in. The online article may have changed since.