How the Laramin screen is organized
Every screen has a menu and a header. Learn what the menu shows you, what each control in the header does, and the keyboard shortcuts that get you around faster.
Why this step
Every screen has the same menu and header. Learn them once and you can find your way anywhere.
Today you only need:
- Applies to
- Core 12.0 and later
- Who can do this
- Administrator, Team member, Platform owner
In short
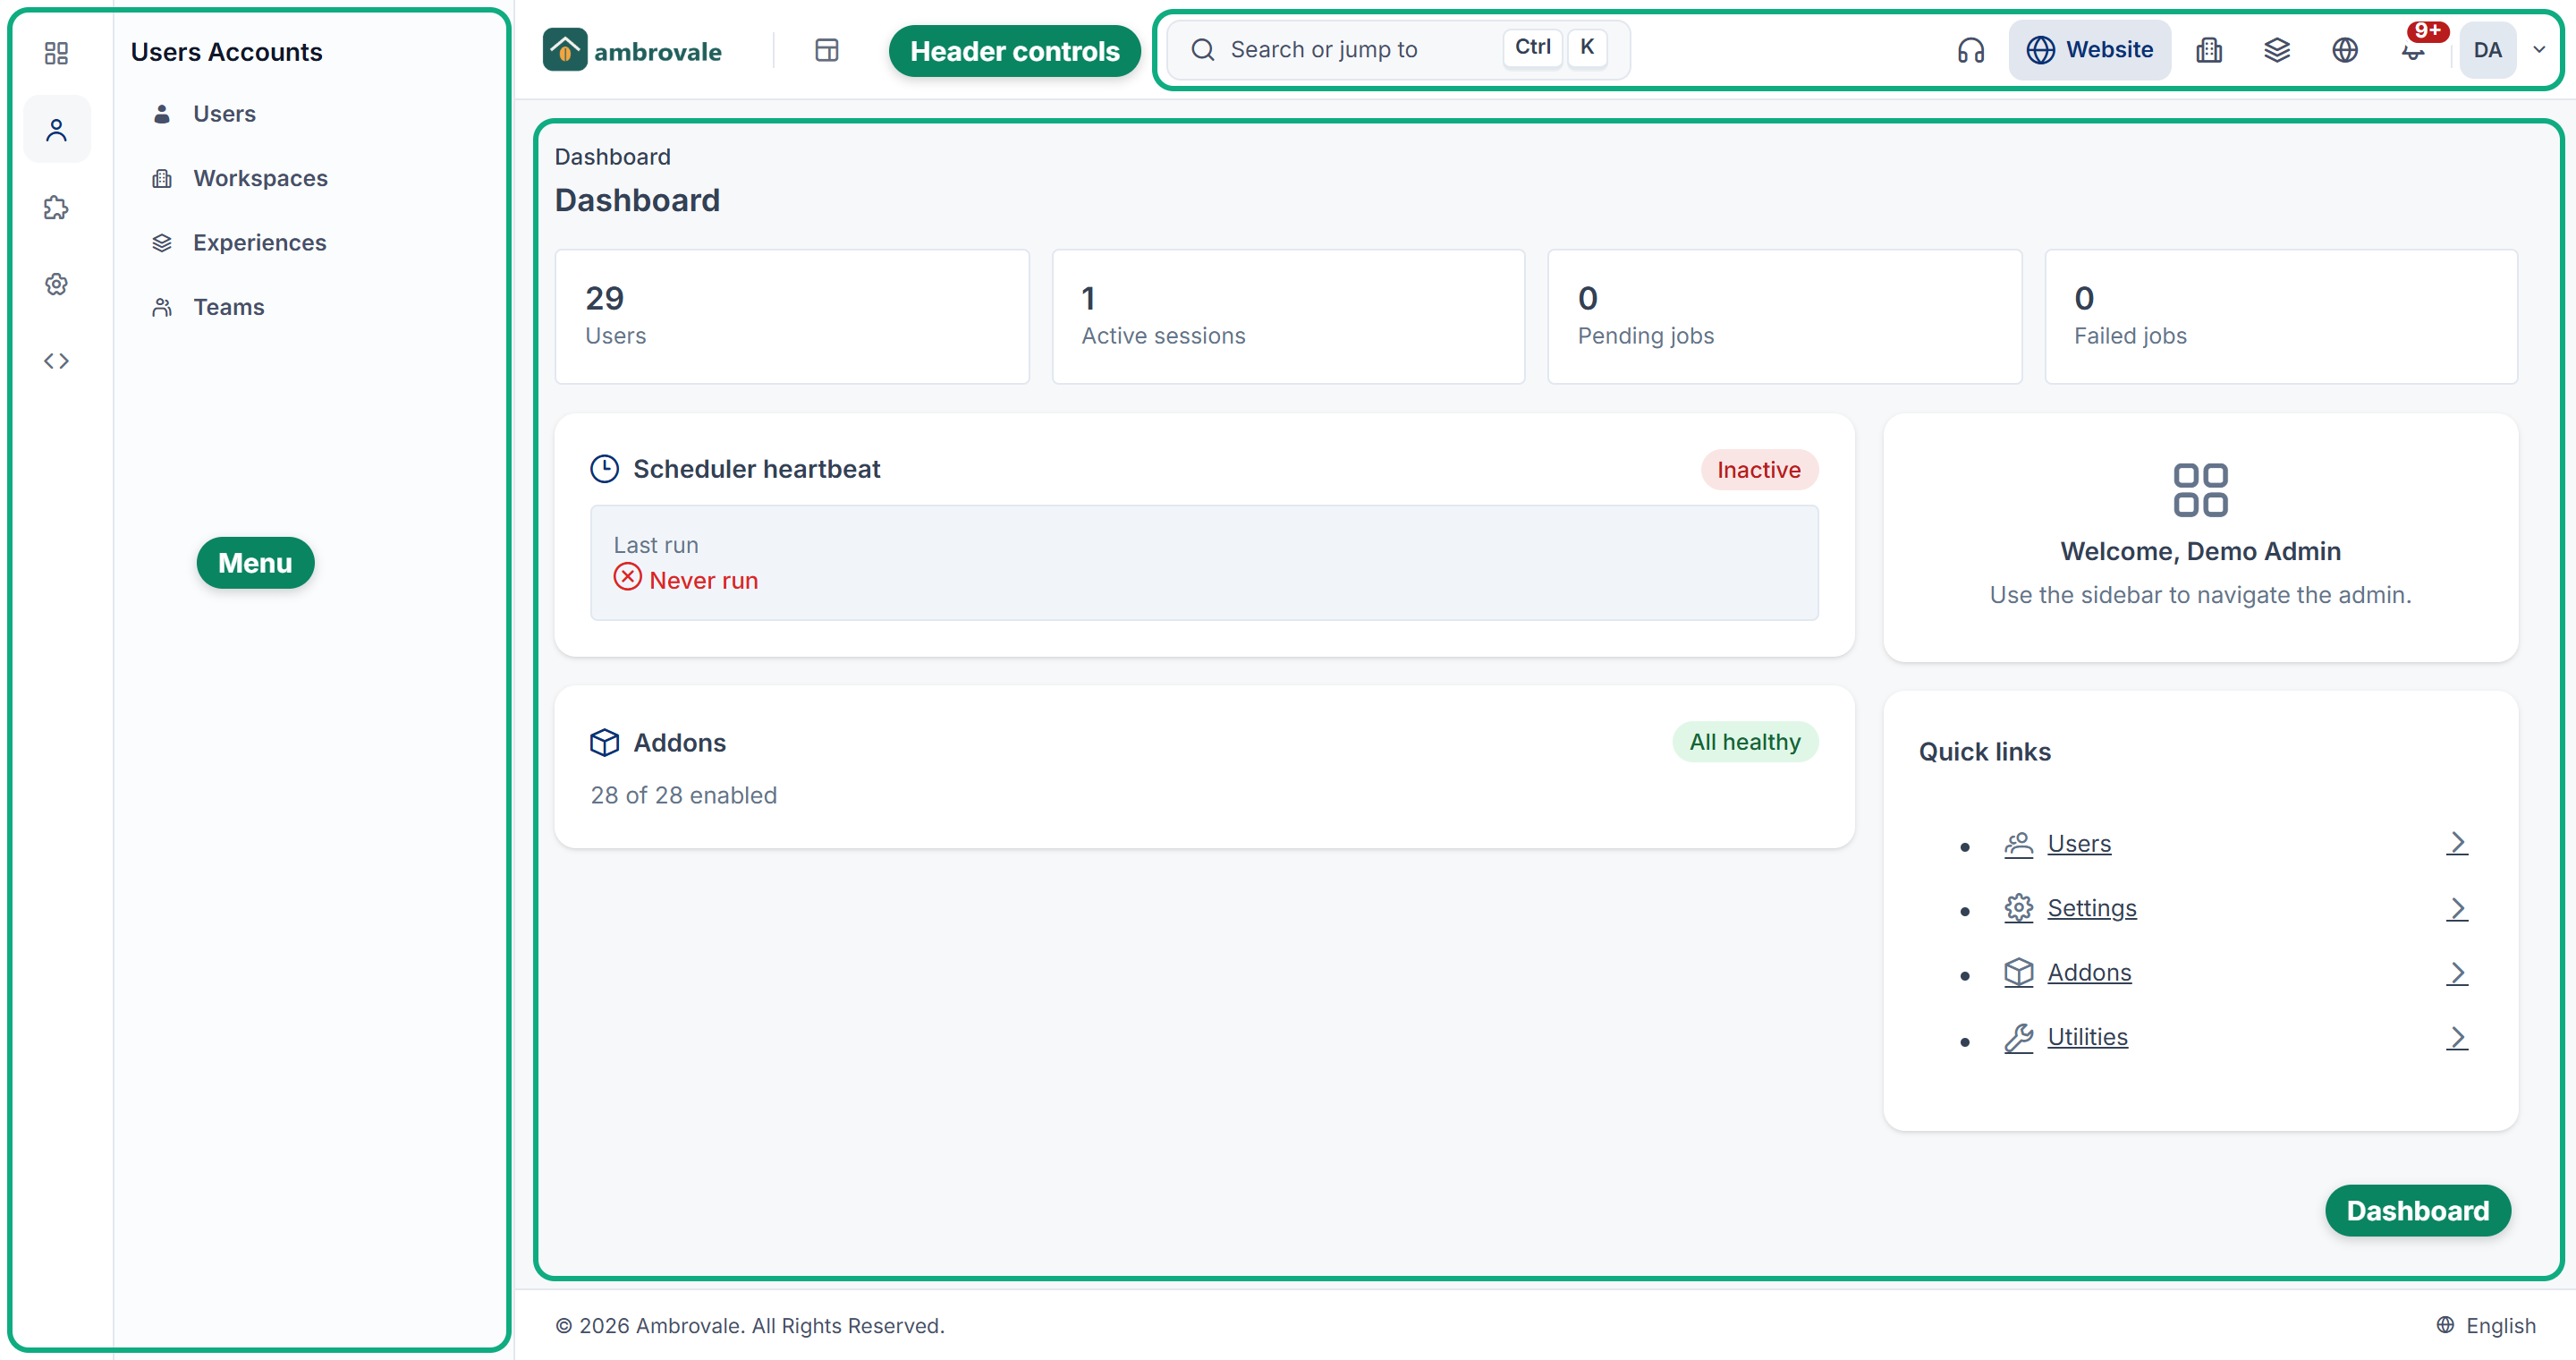
Every Laramin screen has a menu and a header. The menu lists the screens you're allowed to open. The header holds search, the controls that change where you're working (workspace, view and team), your notifications and your account menu. When you sign in, Laramin opens the Dashboard, or another home page if your administrator has chosen one.
How it works
The menu
The menu only shows what you can use. If a role doesn't give you permission to open a screen, that screen's menu item is hidden. You don't get a link that ends in an error.
Your experience decides which menu you see and how the screen is laid out. Laramin includes two experiences, Platform Administration and Administration, and modules can add more. So the menu can look different when you switch to another experience. In Platform Administration, the user screens are under Users Accounts: Users, Workspaces, Experiences and Teams.
On a standard install, the Administration experience's sidebar starts empty: no Core or module menu targets it. Someone who can edit sidebars sees a Configure navigation link there, which opens the Menu Manager.
If a menu has nothing in it, you see This menu has no items yet. Please contact your administrator. Only an administrator can add items to a menu.
The header
The header shows only the controls you can use right now:
| Control | What it does | When you see it |
|---|---|---|
| Search or jump to | Opens the command palette. | When global search is turned on. |
| Workspace (building icon) | Switches the business you're working in, or shows All Workspaces. | When you can enter more than one workspace. |
| View (layers icon) | Switches your experience: the menu, the layout and the home page. | When more than one experience is available to you in this workspace. |
| Team (people icon, or a globe for Global) | Switches the team whose roles you're working under. | When you belong to a team in this workspace. Super admins see it in any single workspace. |
| Notifications (bell icon) | Opens your notification panel. A badge shows how many are unread. | When the Notification Manager module is turned on. |
| ? (Help Center) | Opens help for the screen you're on, in a new tab. See Open the Help Center. | When your role can open the Help Center and a Help Center address is set. |
| Account menu (your name or photo) | Profile, Password & security, Sessions & devices, Keyboard shortcuts, Help Center and Sign out, among others. | Always. |
Hover over the workspace, view or team icon to see where you are now. For example, the tooltip might say "Workspace: Chennai".
Keyboard shortcuts
| Keys | What they do |
|---|---|
| Ctrl+K (Windows, Linux) or ⌘+K (Mac) | Open the command palette. |
| / | Open the command palette. |
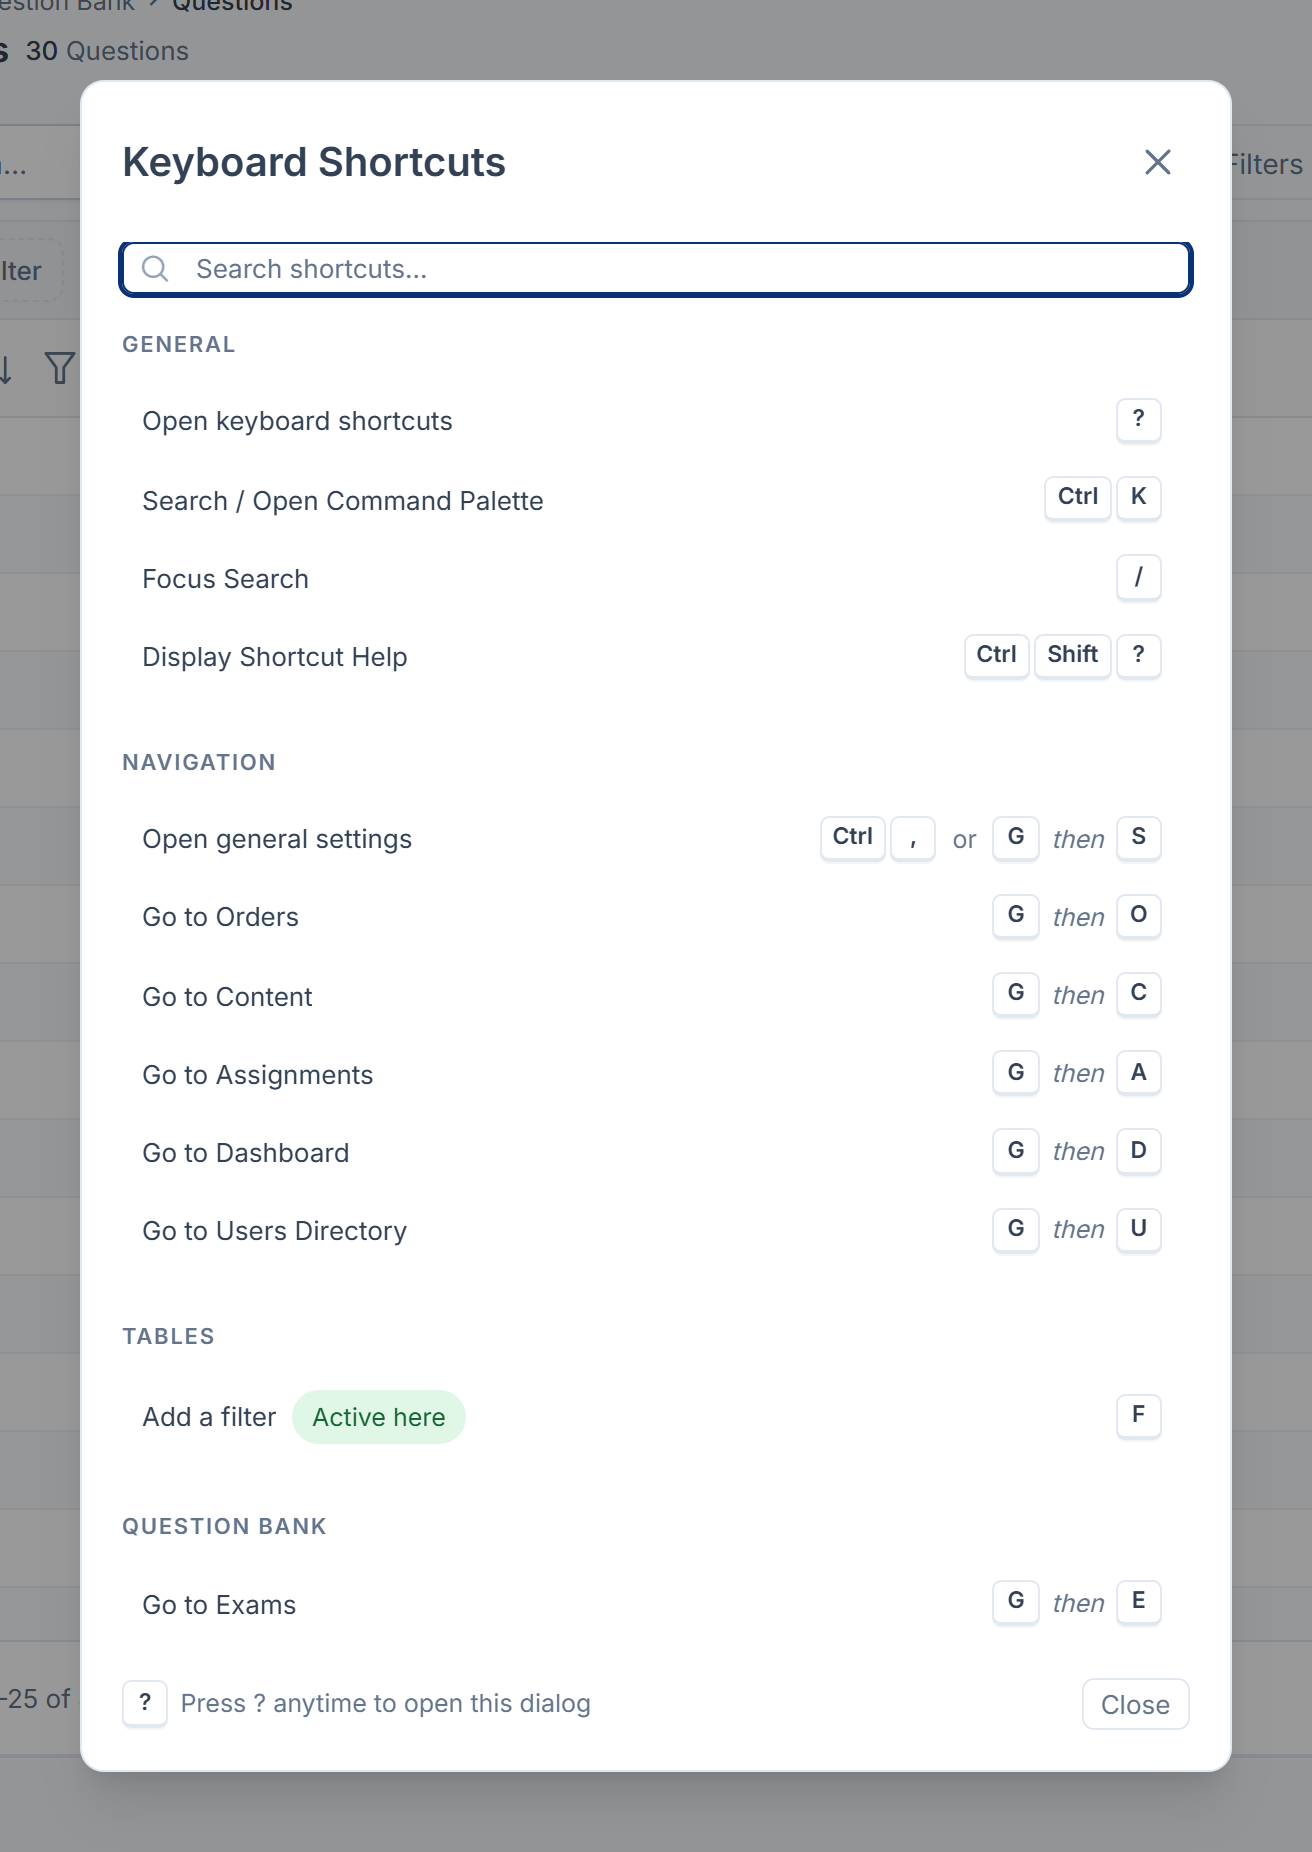
| ? or Ctrl+Shift+? | Open the Keyboard Shortcuts dialog. |
| G then D | Go to the Dashboard. |
| G then U | Go to the Users list. |
| G then S, or Ctrl+, (⌘+, on a Mac) | Go to Settings. |
| Esc | Close the command palette. |
Modules can add shortcuts of their own. For example, the Billing module adds G then O to open Orders, for people who may see that list. A shortcut to a screen you can't open isn't offered to you. To see every shortcut on your installation, press ? or choose Keyboard shortcuts from the account menu. The dialog marks the shortcuts that work on the screen you're on with Active here.
How it relates to
- Workspaces, teams and experiences: these decide what you see and where you are. See Workspaces, teams and experiences: the basics.
- Permissions: these decide which menu items you see. See Permission key reference.
Next steps
Links in this article
Printed from help.laramin.in. The online article may have changed since.